Introduction
Have you always heard about Stable Diffusion but come across annoying errors like OutOfMemory when you try to use it? It sounds like you might have a non-performing PC to run it locally, but don’t worry. We at TheGenerativeX have found just what’s right for you: an online and free to use platform with which you will be able to generate quality images like others do.
In this article, we are excited to show it to you. In our opinion it is one of the best solutions and it is practically like having Stable Diffusion, but without the problems. There’s no need to download anything or follow complicated setup instructions – one simple click and you’re on your way to generating great images. Together we will learn how to use it by creating amazing AI influencers. Let’s dive right in and get started!
Also, If you are interested in this kind of topic, don’t forget to subscribe to our newsletter to keep up to date with our new articles based on AI: thanks to us you will learn how to make the most of it and cooperate with it in this world of full technological development.
Important Links
| Youtube Channel | https://www.youtube.com/@TheGenerative_X |
| Twitter Account | https://twitter.com/thegenerativex |
| Online Course | https://thegenerativex.com/course/ |
| Influencer Generation Service | https://thegenerativex.com/services |
| Tensor Art | https://tensor.art/ |
| Realism Fusion | https://tensor.art/models/625977778422095582 |
What is Tensor Art?
Tensor Art is an advanced online platform that uses artificial intelligence to generate digital images. It uses a sophisticated type of artificial intelligence known as a neural network, which emulates aspects of human cognitive processes to produce visual art.
As the others image generator, Tensor Art‘s main functionality lies in its ability to transform textual inputs into corresponding visual outputs. Users are asked to enter descriptive phrases or keywords, whereby the AI algorithm, trained on a large dataset of images and their descriptions, generates a digital image that attempts to visually represent the text provided.
We believe it is one of the best solutions among those found online thanks to:
- Its accessibility and ease of use, does not require specialized knowledge. The entire process, from input to image generation, is conducted via an intuitive web interface, thus eliminating the need for cumbersome software downloads or complex technical setups.
- The ease of finding and testing different models and LORAs, to generate images of different styles. In fact, it will be possible to try multiple models without having to download them, or preview the images that users have generated using the model.
- Its Remix feature, which allows you to use the same settings that a user used to generate a specific image, from the prompt to the Hires fix settings and the LORAs used.
These are just some of the reasons: continue reading this article to learn more about these features. Also if you are interested, we have created the video version of this article. You can find it on our Youtube channel or by accessing it below: “How to use stable diffusion without GPU – Free and easy!”. We recommend you check it out if you don’t have time to read this article, it only lasts 10 minutes and is very effective.
Pricing Plans: Is it worth buying?
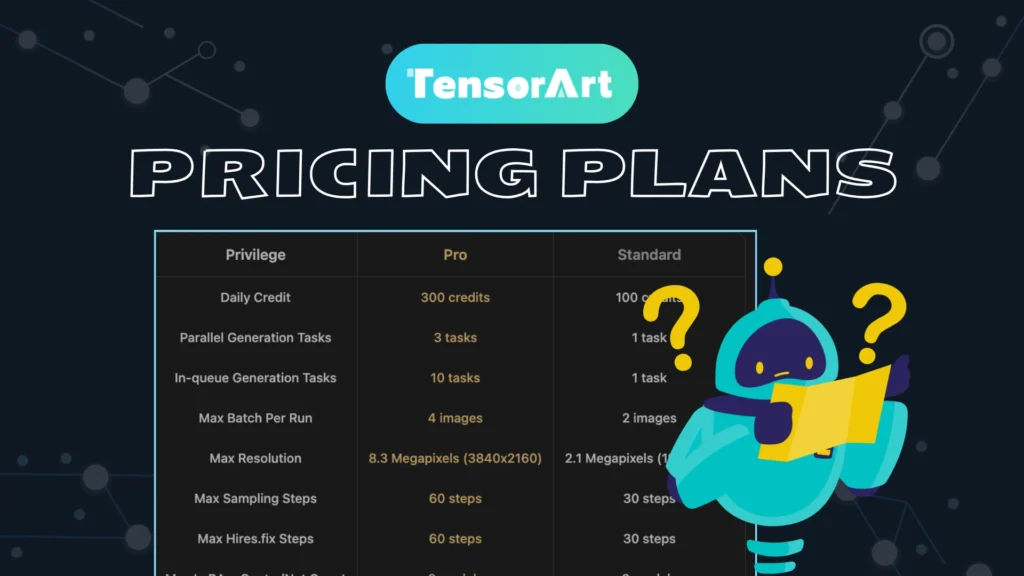
Like all online platforms, however, Tensor Art also presents payment plans. There are two plans, Standard and Pro.
For the first month the PRO plan costs around 1 USD, and is quite affordable. We recommend you try it because this way you will understand the true power of this online platform. In fact, thanks to the PRO plan you can increase the resolution of your images, increase the Sampling Steps and the Hires Fix steps. To understand what I’m talking about, continue reading because you will find a complete list of the settings you can use on the platform: specifically what they are for and how to use them.
In this article we show you what you can get through the Standard plan, so continue reading and watch our video on YouTube to better understand how to proceed to obtain super realistic images without spending a single penny.
In fact, thanks to Tensor Art, you can generate realistic images even if you don’t pay, unlike other online platforms that necessarily require a subscription to obtain that real style that we so desire.
How to start
To use Tensor Art, as we explained in the introduction, there is no need for any download or configuration between files within folders. It uses Stable Diffusion and it’s online and free, amazing right? Just search for “Tensor Art” on your search engine and enter the official page. You should be able to see many boxes representing the images generated by the relevant model. To make your work easier you can access via this link: Tensor Art Official Page.
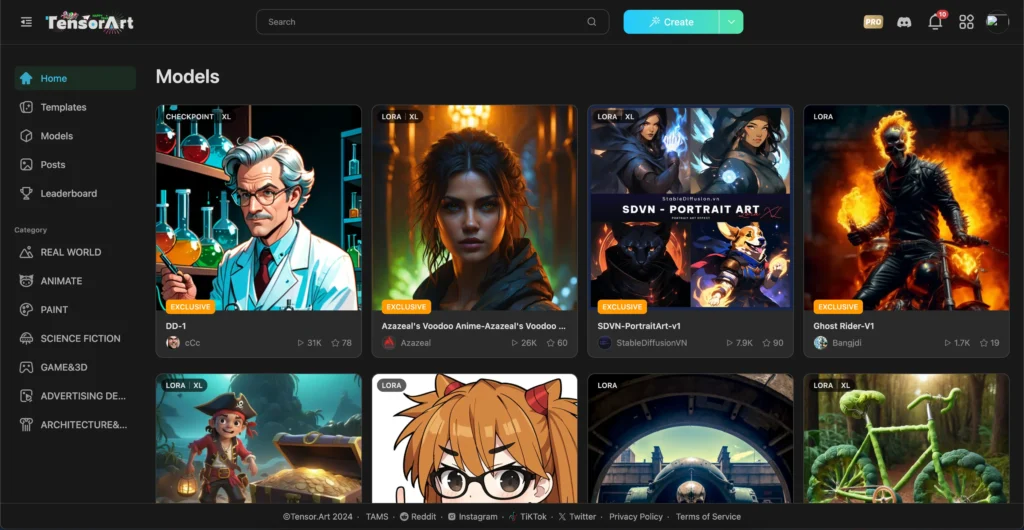
Once inside you can explore it and see the quality of products you can generate through this free and online platform. In fact, what you see on the home page are all the images that users like you have created manually and are now sharing with the community. You can start from these models to create your own personal images. By continuing to read we will show you how.
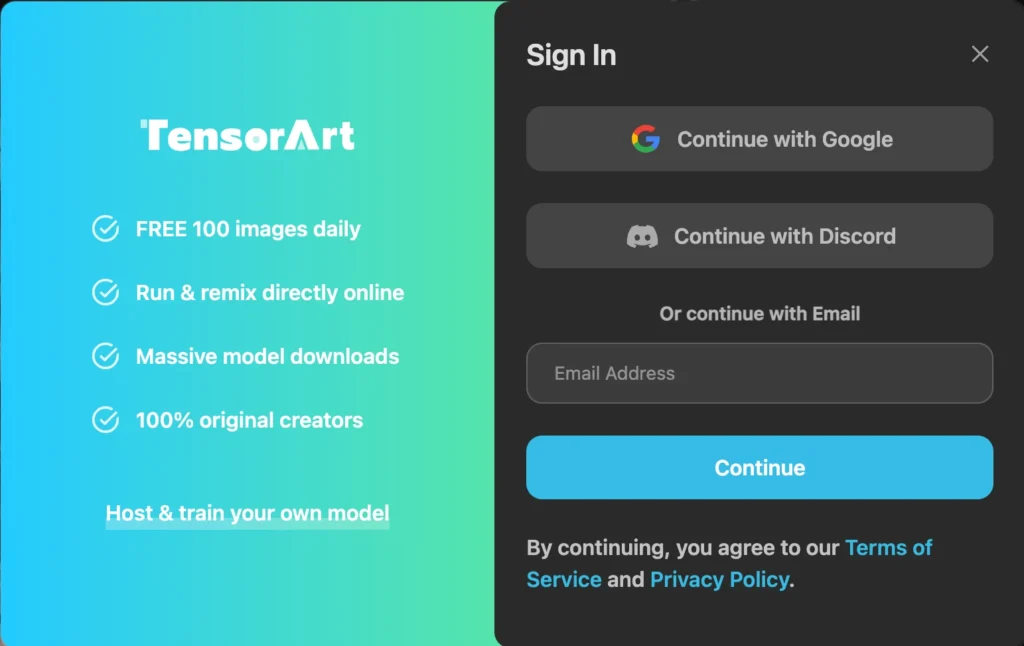
To be able to generate your first image on Tensor Art you must register on the platform using the “Sign in” button at the top right. You can decide to register and log in via your email or using Google or Discord. Once the registration is complete, you are in, now you can access all the features of TensorArt. It was very simple, wasn’t it?
Model: Which one to use?
If you have registered with Tensor Art you can start using the available models to generate your images. To get started you must therefore choose the one you prefer based on your needs. There are many different models, each of these were created by community users and made public, so they are unique: you can choose between cartoon models, realistic models, specific models for animals, and many others.
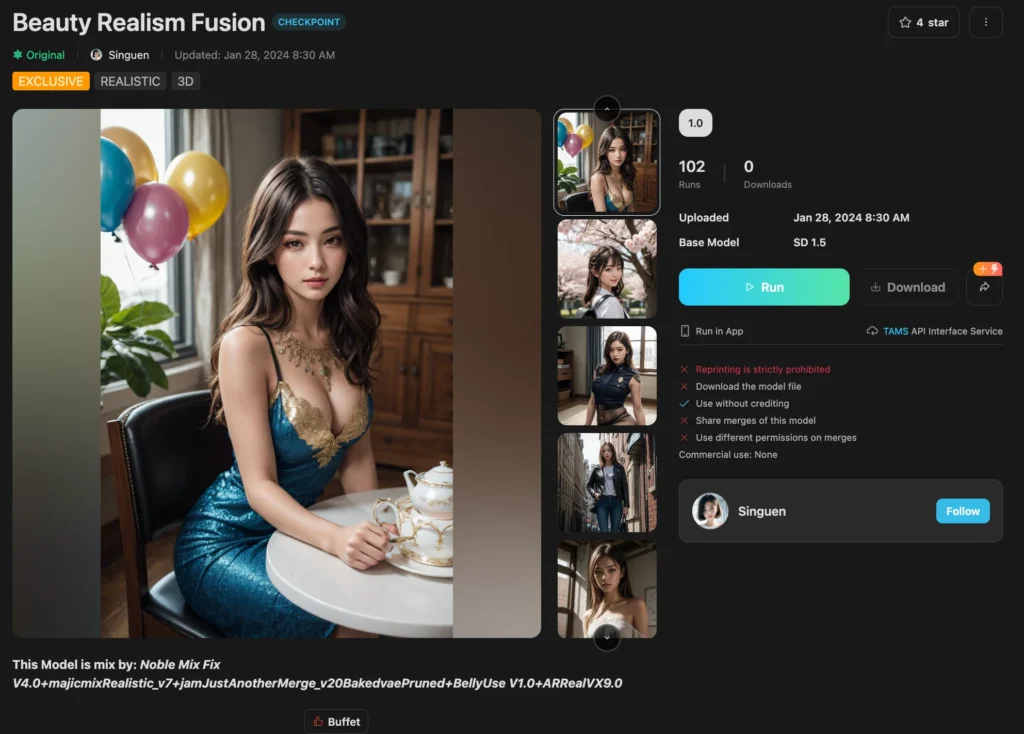
Each model has specifications and requirements to meet, if you click on one you will be able to see them. As you can see from the image, under the Run button there is a list with all model’s requirements (“Reprinting is strictly prohibited”, “Download the model File”, etc.), which you need to pay attention to whenever you intend to generate from the models you find.
If you want to publish your generated images, you need to be careful and make sure that the “Use without credit” section is marked with a green tick. Otherwise you will have to name the model.
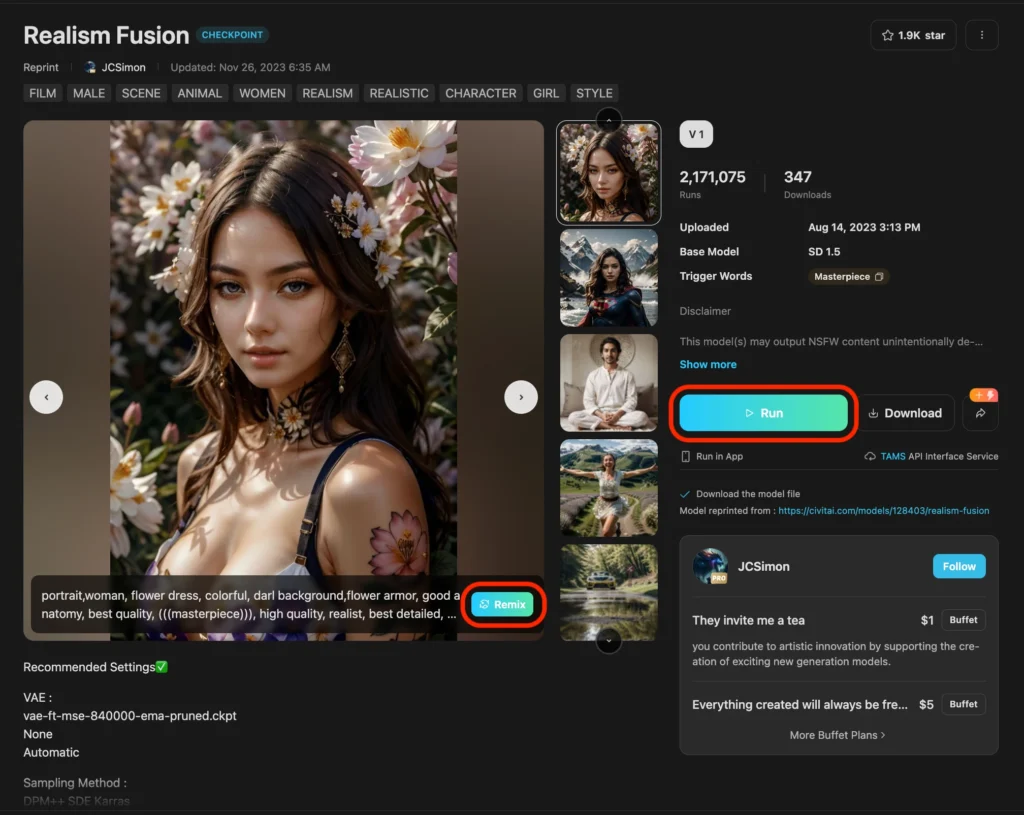
For this tutorial we will need a model capable of generating super realistic images, in order to create our influencer. The model we prefer is called Realism Fusion. We believe it is a good model not only because it allows us to generate realistic images but also because it has no copyright restrictions so we can publish the results without problems.
To use the Realism Fusion model, or any other, you can search for it using the search bar found at the top of the platform. Then select the model you were looking for and you should be on the model page.
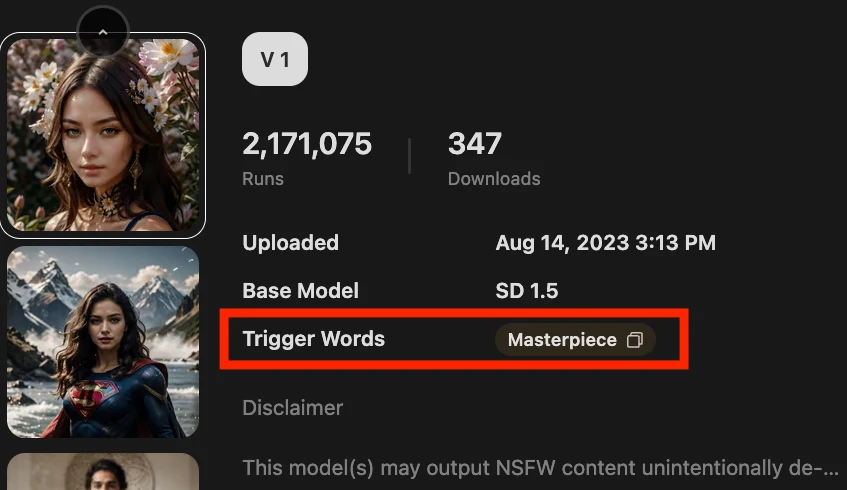
The model page will feature by some examples of the images you can generate using the model, related information such as how many times it has been used (Runs) or if there is a trigger word to use, while at the bottom of the page you will find the images that others users generated using the model.
To start the model you need to click on the Run button. You can also decide to start from an image already created, to keep the settings, to do this click on an image and click the Remix button.
Prompts and Negative prompts
Once you have chosen the model that is right for you, we can proceed with the next step: writing the prompt and the negative prompt. Before explaining what the rules are for writing a good prompt and negative prompt, it is important to know what a prompt is and why it is needed. As you can read from Aws Amazon a Prompt is:
“A prompt is natural language text that asks generative artificial intelligence to perform a specific task. […]”.
In simple words, the prompt is a set of words and phrases that describe the final result we want to obtain: the more detailed it is, the more the image generated will represent our prompt. For example, if you want to generate an image of a woman you would write something like “a beautiful woman”. The AI should then generate a woman for you.
In our example, we also want to generate a woman, but specifically a 20-year-old female influencer, so we will write: “Masterpiece, Influencer, beauty, 20 year old, Italian girl.”
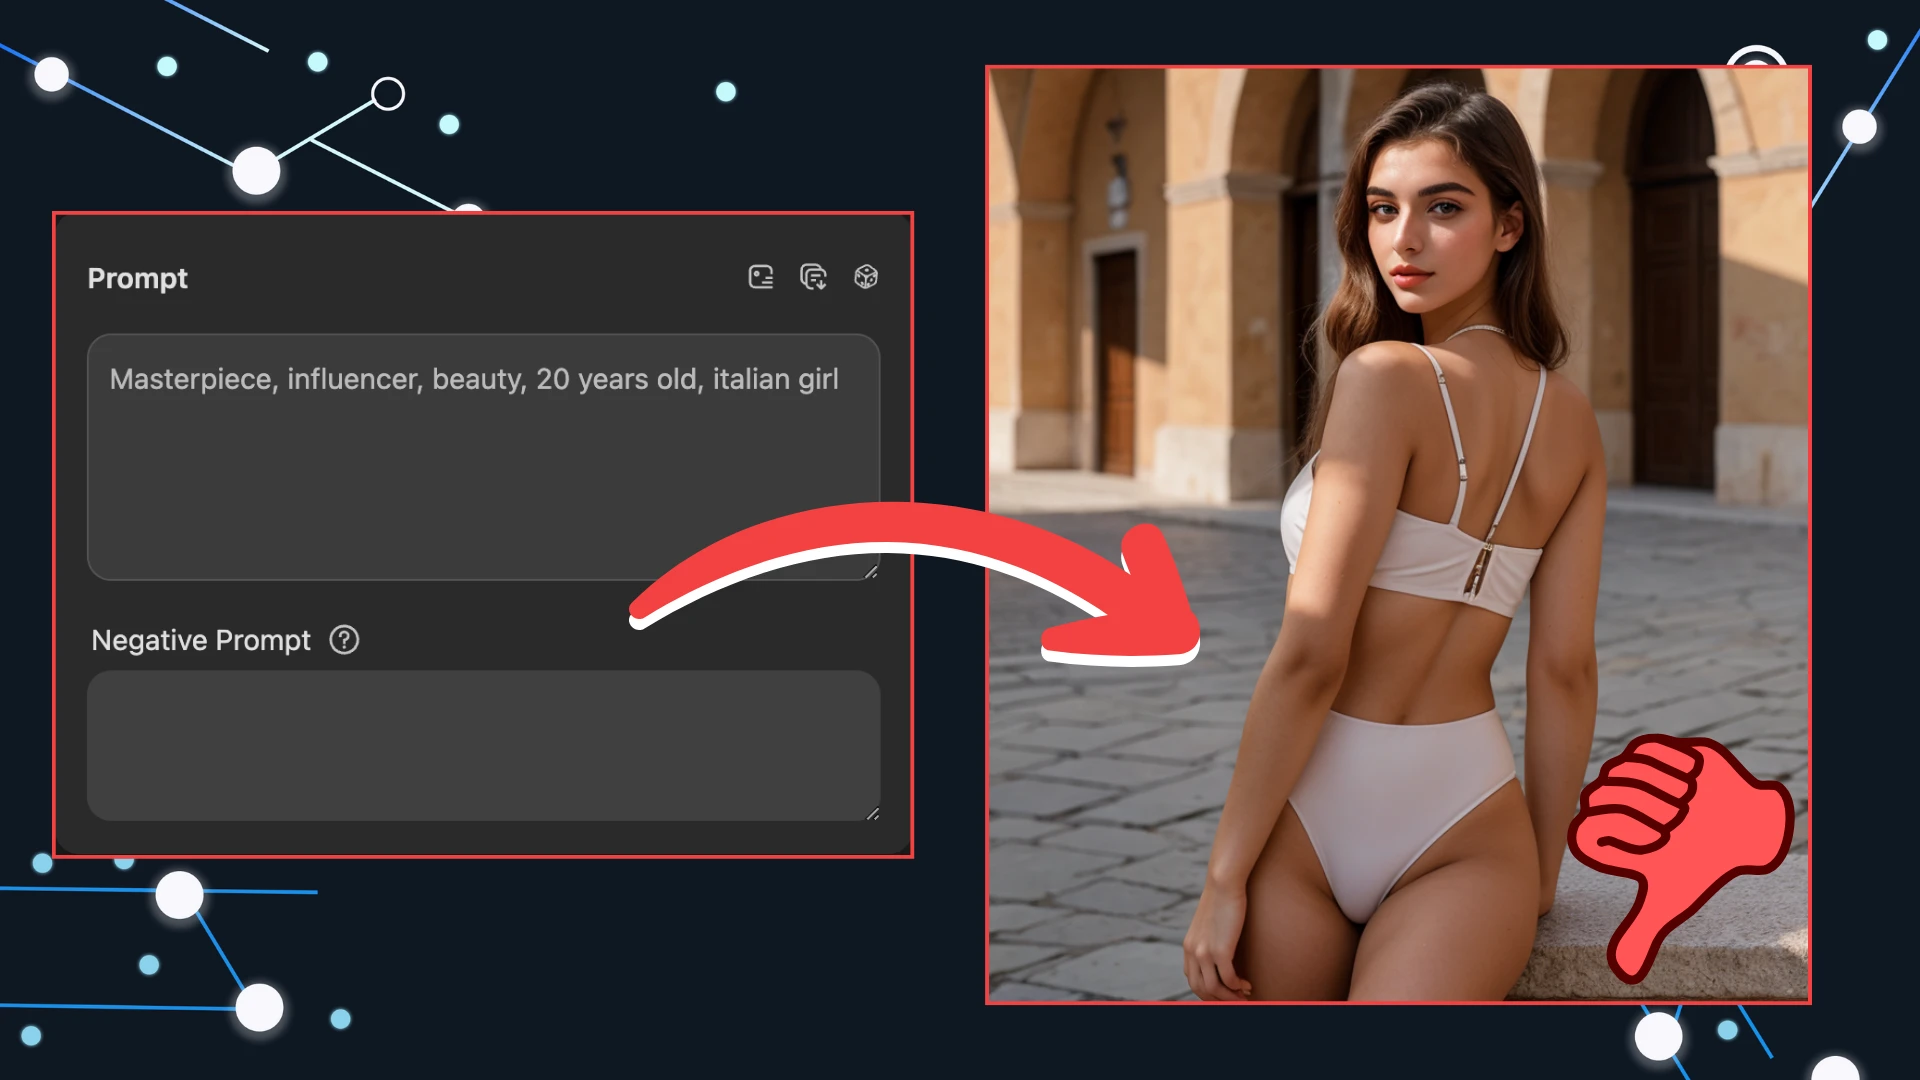
NOTE: “Masterpiece” is the trigger words to operate the Realism Fusion model. Without the trigger word, the model will not work correctly. It is nothing more than a set of standard words and phrases that the AI must generate: it is therefore a sort of shortcut prompt. You can check the trigger words, on the model page.
Instead, the negative prompt has the opposite function of the prompt, it is a list of words and terms that we do not want to be generated in the final result. For example, we don’t want my woman’s face to be deformed, so we’ll write words like “deformed” or “malformed” and so on.
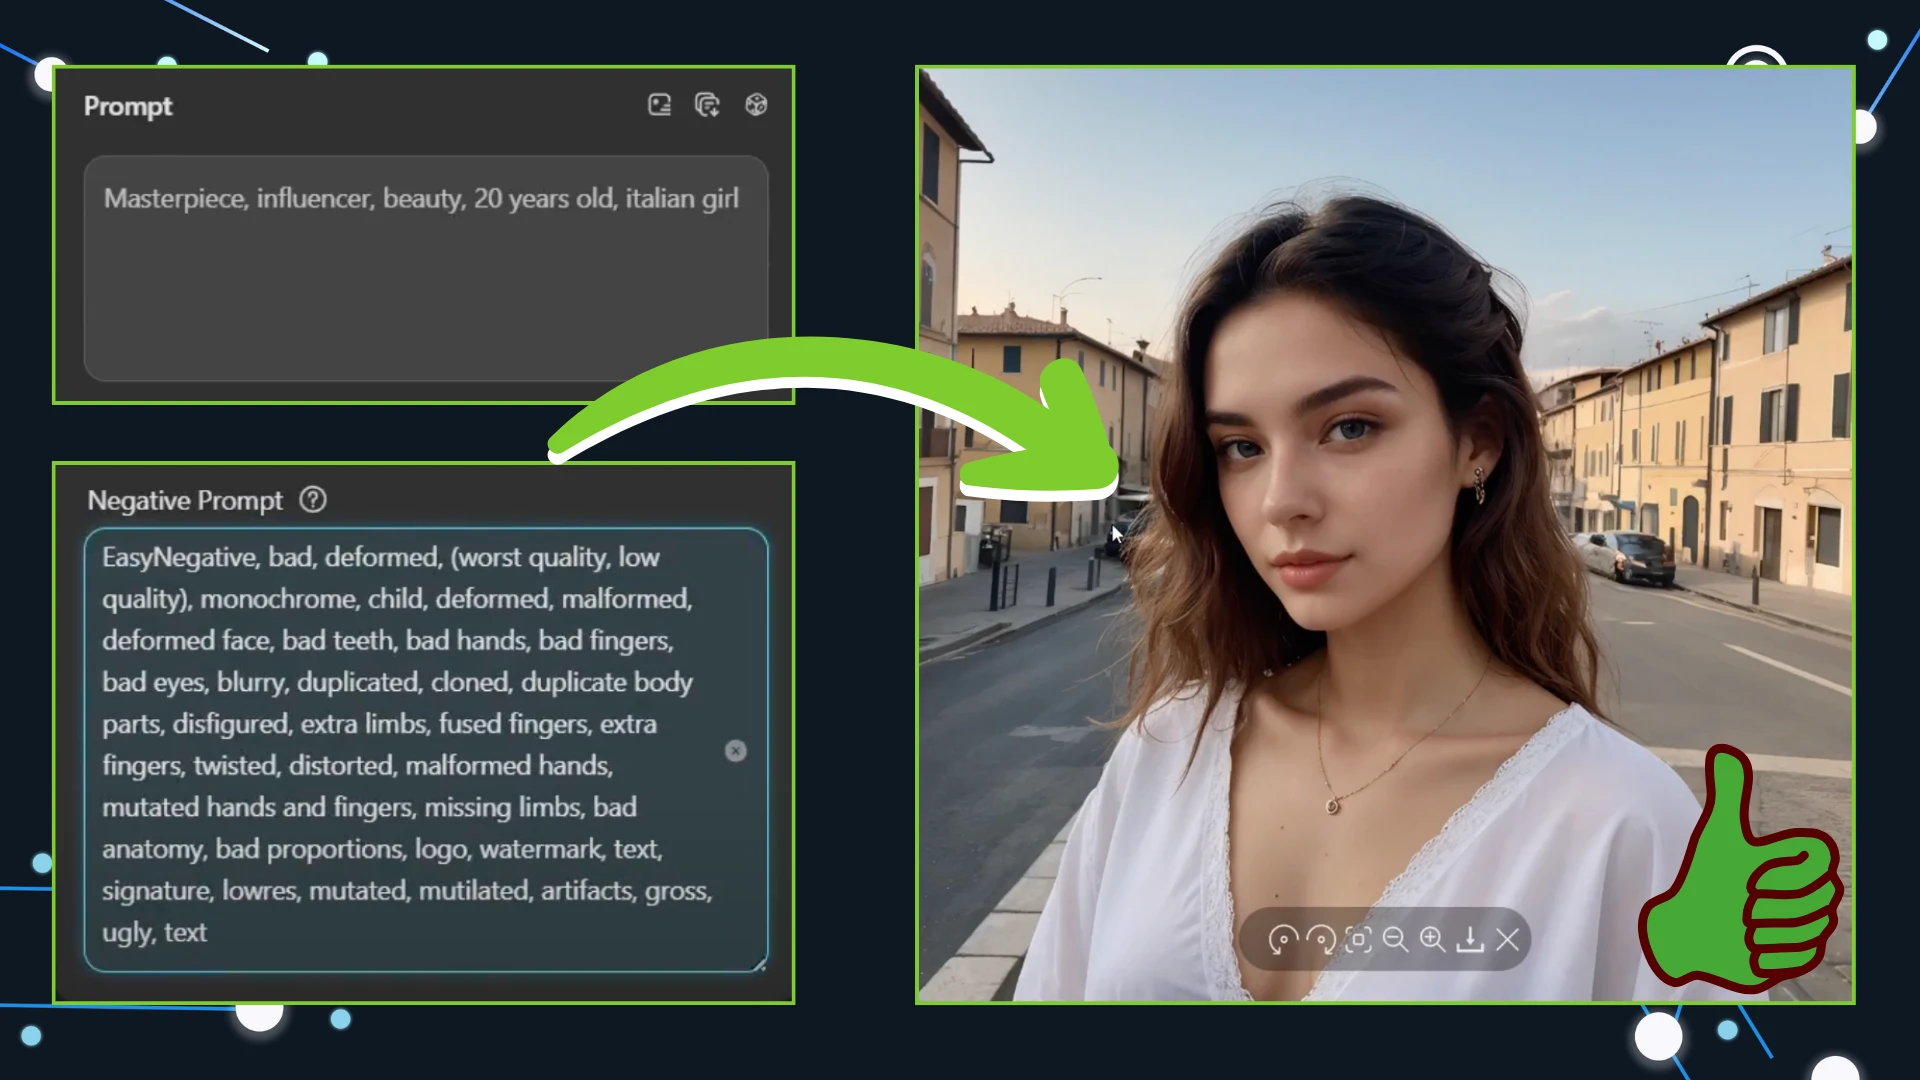
To make things easier for you, we’ve attached a ready-made negative prompt that you can copy and paste: this contains the most used negative words to get an almost perfect image. Of course, don’t hesitate to add other words or phrases.
TIPS and advice on how to write a prompt
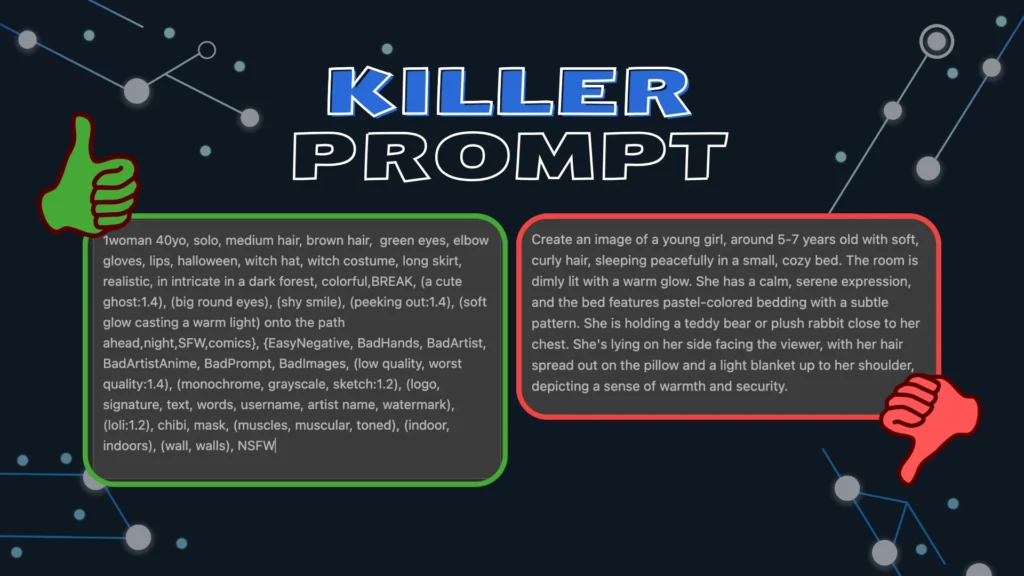
Writing a perfect prompt is not as easy as it seems, we struggled with it quite a bit before finding the right method. We understood that to be detailed you don’t necessarily have to write long sentences, but use keywords and more.
We at TheGenerativeX want to share with you part of our analysis on the topic, you can find the complete list of tips and tricks on how to write a Killer Prompt in our dedicated Stable Diffusion and Influencer Girl courses. Take a look and sign up for the course you prefer by accessing the page via this link: Online Courses.
- Start with a BASE PROMPT like this: best quality, 4k, 8k, ultra highres, raw photo in hdr, sharp focus, intricate texture, skin imperfections, photograph of..
- One important technique are emphasis and de-emphasis. Use parentheses () to emphasis something, you are telling the AI which part is more important.
- Use square brackets for meta-instructions or to define the style or mood [photorealistic, impressionist].
- Don’t use sentences that are too long, almost narrative: use keywords separated by commas.
- Separates the subject from the background by a point
- [read more in our courses]
Also you can check out this article on Medium, to learn more: “Beginner Tips For Mastering Stable Diffusion Prompts”
Generation Settings
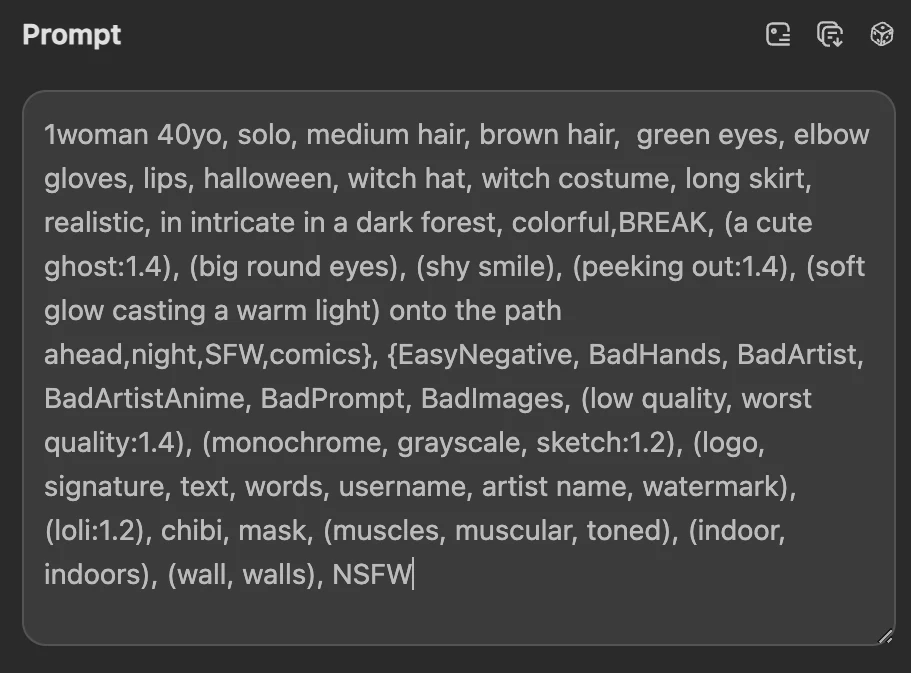
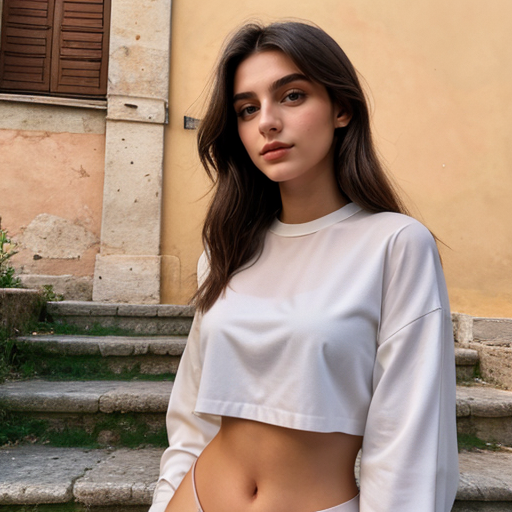
In this paragraph you will find all the settings that we have set to generate the image of this beautiful girl that you see below. Once you have configured the settings you will need to click the Generate button.

If you are interested in wanting to generate an influencer model, we want to let you know that we offer a service for creating and managing an AI model, we will take care of generating all the consistent images and publishing them on your social networks. If you are interested, read more about it and contact us on this page: The Generative X – Services.
Otherwise, if you want to personally take care of the creation and publication of your influencer, but you want to have in-depth information on how to do it, you can sign up for our specialized “Influencer Girl” course to learn every detail on how to create it: is a training course that will help take you from level 0 knowledge to expert.
Aspect Ratio
The aspect ratio indicates the size of the image, and can be square (1:1), portrait (1:2), landscape (2:1) and custom.
You must use one of the first three and not the custom aspect ratio, because the subjects of the images will be deformed or duplicated. For this tutorial we will choose the square aspect ratio.
Sampling Method
The sampling method is a very technical concept, in simple words:
- “SAMPLING” means the procedures with which the images are generated
- “METHOD” refers to the generation methods, these differ in speed and quality
In this article you will not find in-depth information regarding each method because a dedicated article would be needed.
Just know that you will get good results regardless of the method used, once the generation is finished we recommend you do some tests and choose the one that comes closest to the style you want to achieve. For this tutorial you can choose the same one we used: DPM2 KARRAS.
Sampling Steps
Sampling steps represent the number of iterations needed to go from random noise to a recognizable image based on the text message. Therefore, the greater the number of steps performed, the more noise will be removed until the image is generated.

It is thought that by using the maximum number of steps, greater quality and detail is achieved, but this is not the case. The advice we give you is to always set them between 20-25 steps, never less and never more, after this number of steps the noise will have already been sufficiently removed:
- A few steps (<20) are not sufficient for correct image generation and you may experience deformations or blurring. This means that the noise has not been completely removed.
- Too many Steps (>=30) are unnecessarily excessive for two reasons: the first is that, as you can see from the image above, the images generated via 20, 30 or 100 steps will be very similar to each other; the second reason is that an image could be generated with defects such as extra fingers, distortions, extra arms or legs, etc.
CFG Scale
The CGF scale controls how closely the generated image adheres to your prompt. A higher value results in images that closely match the description of your prompt, while a lower value leads to more varied images. The recommended range is 3-15. We use the value 7 for this generation.
Advanced Settings
In the advanced settings, there will be two values: Clip Skip and ENSD. As for the Clip Skip, the smaller the value, the more the final image adheres to the prompt. A value of 2 or 1 is recommended, we will write 2 . We won’t be using ENSD for this tutorial so you can leave it as is.
Hires Fix
The Hires fix is used to add details and increase the quality of the image. Activate this setting using the toggle next to the name.
Within this section you can upscale the image to increase its quality: if you have the Standard plan you will not be able to go beyond 2x.
But don’t worry, we have found a solution to get around this problem: it is an online application that allows you to upscale images without having to spend a penny, it’s called Upscayl.
You can also decide on the upscaling method: TensorArt offers you a sufficient list of choices. We can tell you that “Latent” is a good general purpose option, while the R-ESRGAN 4x+ works well for photorealistic images, so we will choose this one, instead R-ESRGAN 4x+ Anime6B is good for animated/cartoon style.
| Hires Fix | Purpose |
|---|---|
| Latent | General purpose |
| R-ESRGAN 4x+ | Photorealistic images |
| R-ESRGAN 4x+ Anime6B | Animated/cartoon style |
Hires Steps
Hires steps refine image quality after initial sampling. Remember to set it to half the sampling steps you have set. We set it to 10.
Denoising Strength
The denoising strength indicates the intensity of redrawing the image, 0 means no redrawing will be done. We recommend setting this to 0.3 to avoid the end result being far too different from the prompt
ADetailer
The ADetailer section is used to add details, it is very often used to perfect the face or skin texture, to improve general imperfections or for hand deformation. This section is full of settings but for this tutorial we will only dedicate ourselves to activating it without configuring it in detail. If you are interested in learning more, let us know by commenting on our dedicated YouTube video or by contacting us on Twitter.
Then we activate the ADetailer via the toggle and that’s it. It is not necessary to add a dedicated prompt, you can do this if you want to be specific in some image improvements.
EXTRA TIP: Consistency in faces
If you have reached this paragraph, it means that you are truly determined to achieve exceptional results. Keep reading because we are about to reveal a little trick to achieve consistency in your influencer’s faces.
One of the main problems of generating these realistic images is the consistency in the faces. In fact, for those who wish to undertake this path and want to achieve perfection, it is important to publish multiple images of an Influencer with the same face! If there are different characters in multiple photos, credibility drops to 0, and that’s not what we want.
To achieve consistency there are many methods, the simplest and fastest one does not involve the use of advanced and/or paid tools: it is the generation prompt itself, which if written correctly allows us to generate the same faces in multiple images .
There are some steps to follow: first of all we have to give the model a name and an age, we decided to call her “Sofia”; subsequently we have to describe the visual traits starting from one or more famous people, for example we write “with the face of Angelina Jolie and Megan Fox as a young woman”. This comparison is effective because we allow the AI to take cues from existing people to create incredible and unique fusions. The AI will therefore not rely only on the model used, through which it will always generate the exact same face, but with different visual features.

Conclusion
In this article you have discovered and learned to use a free online platform that allows you to generate images via AI without having to download and burden your PC.
Thanks to our advice on how to write the Prompt correctly and which settings to use among those offered by Tensor Art you now know how to generate a realistic Influencer.
Thank you for reading this article We also advise you to practice a lot before starting this new activity, the first generations will be the most difficult. If you have trouble generating, don’t hesitate to contact us on Twitter or leave a comment on the dedicated video you find on YouTube. Or we can take care of the generation of your AI Influencer: to understand what we mean, take a look at our service “Generation of your Influencer Model and social management”!