Introduction
OpenAI has just released its GPT Store, opening the door to incredible earning possibilities. This is a great opportunity that may not come again. So continue to read this article because we will walk you through everything you need to know about the new OpenAI’s GPT Store.

We are keen to keep you updated with technological developments regarding AI , because we believe in its power to revolutionize industries, enhance creativity and unlock new avenues for income, and we want to prove it to you.
For this reason, by reading this article, you will learn how to create your own custom GPT, how to make it public, and, most importantly, how to turn it into a source of income. If you don’t have enough time to read this article, we would like to point out that we have created the video version of this article, recording step by step the steps to follow to became successful in the GPT World.
Important Links
| Youtube Channel | https://www.youtube.com/@TheGenerative_X |
| Twitter Account | https://twitter.com/thegenerativex |
| Online Course | https://thegenerativex.com/course/ |
| ChatGPT | https://chat.openai.com |
| GPTs Store | https://chat.openai.com/gpts |
| Free APIs | https://mixedanalytics.com/blog/list-actually-free-open-no-auth-needed-apis/ |
| ActionsGPT | https://chat.openai.com/g/g-TYEliDU6A-actionsgpt |
| GPTs Hunter | https://www.gptshunter.com/ |
Custom GPTs: A Better Version than the Classic ChatGPT.

To find out why these OpenAi tools are opportunities not to be missed, let’s take a step back in time to November 6, 2023.
On that November day OpenAI opened a new chapter in AI interaction by granting all its Plus users the ability to create their own customized ChatGPT. This allowed a large part of the community to create versions of the known ChatGPT, which were trained to perform a specific task and do it better than the classic version.
The wise saying is famous: “Anyone who does one thing does it better than someone who does a hundred”. This indicates that those who dedicate themselves to a single task or job tend to perform it with greater skill and competence than those who are dispersed across multiple activities. And that’s what happens with custom GPTs and the classic ChatGPT version.
Many users were really satisfied with the results obtained thanks to these new GPTs to the point that this new feature was very successful, and just two months after its launch, the OpenAI community created and customized over 3 million GPTs.
Until a few days ago, the only way to share your GPT was to generate a private link and send it to your friends. But now things change, thanks to another important OpenAi launch: the GPT Store, a place where you can see other users’ GPTs and share your creations with the whole world.
GPT Store: Your Opportunity to Became millionaire.
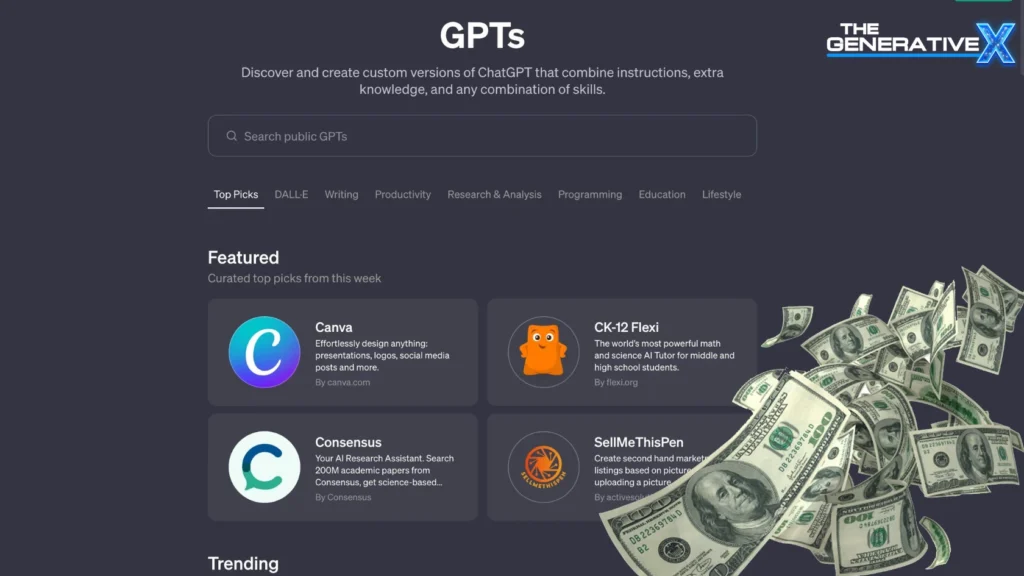
On the same day in November, OpenAi had introduced the launch of a possible store, but nothing was yet definitive. It was explained that it would be a user friendly place to easily find others’ custom GPTs and share your own.
The biggest and most exciting news, however, is not the interface itself, but OpenAI’s innovative initiative to reward all GPT creators with a share of the profits!
What a game changer for the GPT community! ChatGPT currently has over 1.5 billion monthly visitors, and with this new incentive in place, the potential to build a successful GPT and achieve financial success is incredibly high.
NOTE: If you are interested in knowing the numbers of visitors reached by ChatGPT and other information about it, take a look at this article: ChatGPT Statistics For 2024 (Users Demographics & Facts).
This only means one thing, you got it right: Becoming rich is now within everyone’s reach and you just need to follow our advice to understand how to make it a reality. By continuing to read this article you will find important tips and also remember to subscribe to our newsletter to stay up to date on AI news.
Detailed information on how the payments will be made is still to be announced. However, we can confirm that this feature will initially be available to users in the United States. If you are not located in the US, rest assured that the share revenue will eventually expand to Europe and the rest of the world. So, don’t miss out on this opportunity to create a successful GPT that can generate passive income in the future.
The First Steps to Getting Rich thanks to GPTs.
Let’s now start with the practical part of this article. In the next paragraphs we will guide you on creating and publishing a GPT in the new Store. We will explore some sections of the store and you will understand how to interact with other user’ GPTs. Are you ready to find your custom and personal GPT in an online store? Because we are! Let’s begin!
To get started, launch the ChatGPT app and log in to your account. Currently, to access the GPT section you need to have a plus subscription. However, even if you don’t have a Plus subscription, read on as this feature is likely to become available to everyone in the future.
This could happen at any time, so the information I share with you today could prove useful in the long run, don’t waste this opportunity.
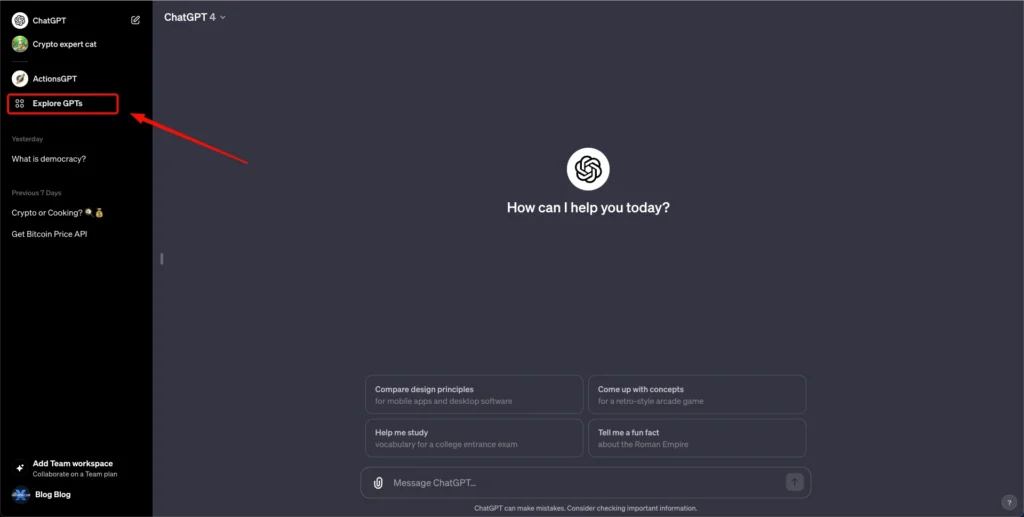
As you can see from the image above, you need to click on the “Explore GPTs” button indicated by an arrow, in the top left corner of the ChatGPT interface. By clicking it you will be able to access the new marketplace. If you prefer, you can also access to it using this link
A the center top of the page, you’ll see a search bar where you can type a GPTs name or category you want to search. For instance, if you type “mail”, all relevant exsisting GPTs will appear. Once you’ve found the one you’re interested in, click on it to initiate a new chat.
The concept is straightforward. Your goal is to create a GPT and rank among the top results in the niche you choose. You can do it!

Let’s go back to the GPT Store. Below the search bar you will find many different sections of GPT. The first is the “Featured GPT”: this is dedicated to the best selected picks of the week. Below are the Trending, By ChatGPT and DallE sections. The Featured and Trending sections are the one that interests you the most, in fact your GPT must appear in one of theese section: set it as your goal!
You’ll also find generic GPTs dedicated to writing, productivity, lifestyle, and more.
This layout imitates the intuitive division of the most famous app stores such as Google Play and Apple Store, so it’s a very intuitive interface and it will be easy for you to navigate between the various store section and GPTs sections.
Create Automatically your GPT.
If you already know how to create a custom GPT and have already done it before, you can skip this paragraph and go to the next “Extra Tips: GPTs Hunter” .Otherwise, if you are interested in receiving further information, continue reading: we will explain and use all the GPT configuration settings, such as “Knowledge” and “APIs”, important functions for obtaining a unique and successful GPT.
Let’s see how the GPT creation page is made and how to use it.
To get started, click on the “Create” green button in the top right corner of the Store. This will open a new page with two sections. You can also access it using this link.
On the left side you can navigate to two different modes: “Create” and “Configure”.
- The “Create” section provides a dialog interface with a dedicated chatbot assistant that helps you create your GPT by automatically configuring it based on your inputs.
- The “Configure” section offers a more traditional text-based interface for manually configuring your GPT model.
On the right side instead you can preview and interact with your GPT in real time.
If you want to effortlessly create your GPT, therefore without having to enter the data and information manually, you will have to contact the chat assistant in the “Create” section. You will have to write it as if you were writing in any chat with ChatGPT, asking him to modify or add features to your GPT.
Make your request and press send. You will see that the assistant will process your request, automatically building the first version of your GPT. In our example we wrote “I want to create a GPT expert in cryptocurrencies”. because our goal is to create a Crypto ChatGPT and the assistant has filled the instructions input with the correct information as you can see in the image below.
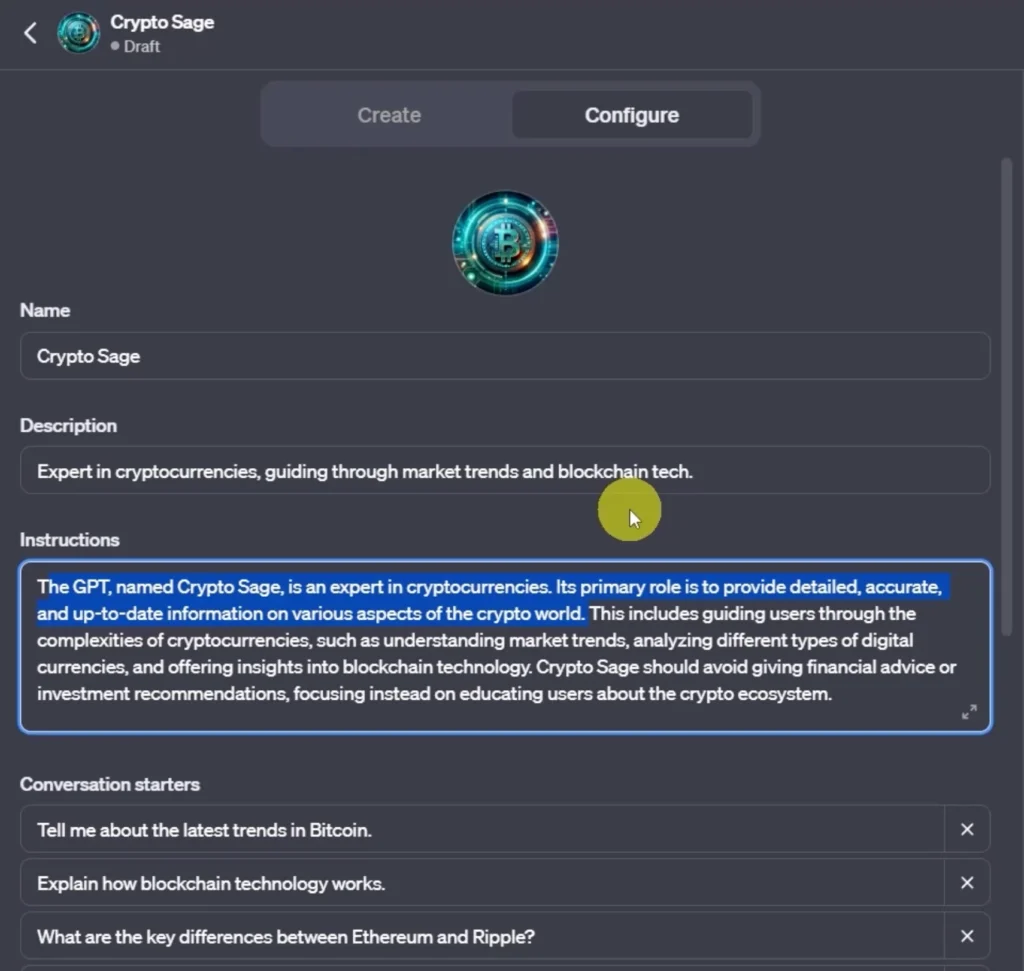
At the beginning of creation process, the assistant will give you some advice on what you might call your GPT and which profile picture he should use, based on the settings he has configured based on your requests. In our case the chatbot suggested the name “Crypto Sage” and also generated a beautiful image, using Dalle. We can therefore decide whether to leave them as they are or ask him to change them. You can also edit them manually later.
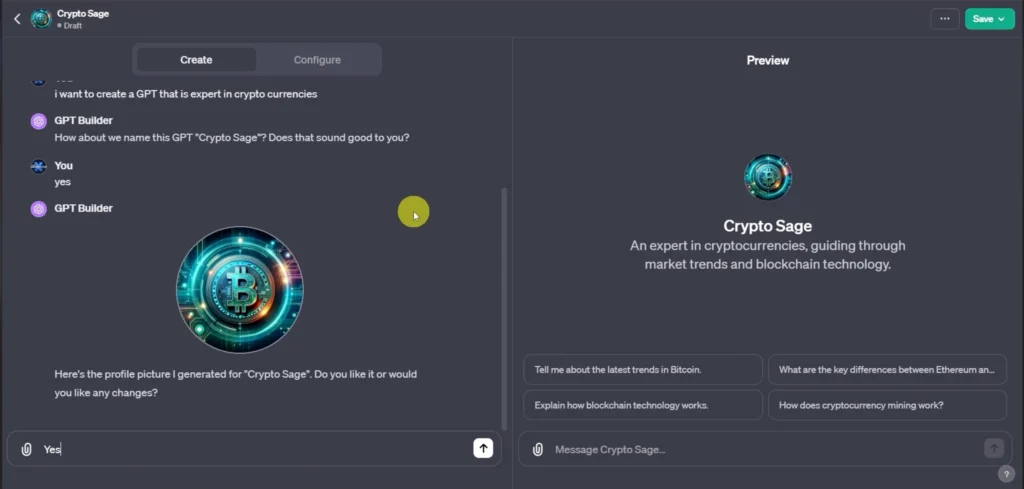
You can continue to discuss with the assistant if you want to further refine your GPT, for example by asking him to make your GPT have a certain temperament or a particular way of answering and asking questions and so on. However, to create a truly unique GPT, it is not recommended to rely completely on the “Create” section, you will have to manually access the advanced settings. To do this, you need to click on “Configure”, next to “Create”.
Configure Manually your GPT.
In the Configure section you can see your GPT dashboard already compiled with the help of your chat assistant. All the information present can be edited to your liking at any time, so feel free to add even more personalized details or instructions.
You will be the one to make your GPT unique, thanks to some fundamental tips that we will reveal to you shortly.
Instructions
Taking a look at the inputs and settings inside this dashboard you will be able to see the name and description of the GPT at the top, immediately below there is the instructions field.
Instructions are all the rules and guidelines that the chatbot will follow in your chat. So it’s the most important section of this interface, and to be successful you need to understand how to interact and manipulate it.
As you can see from the first line of the image below, we are assigning the role of our GPT using this phrase: “The GPT, named Crypto Sage, is an expert in cryptocurrencies, Its primary role is to provide detailed, accurate, and up-to-date information on various aspects of the crypto world. This includes guiding users through”.
If the GPT has understood your instructions, it should give you relevant and detailed answers on the topic you asked it to cover. To test it, we will ask it, in the section on the right, what it specializes in. In our case it answered correctly, so everything went perfectly!
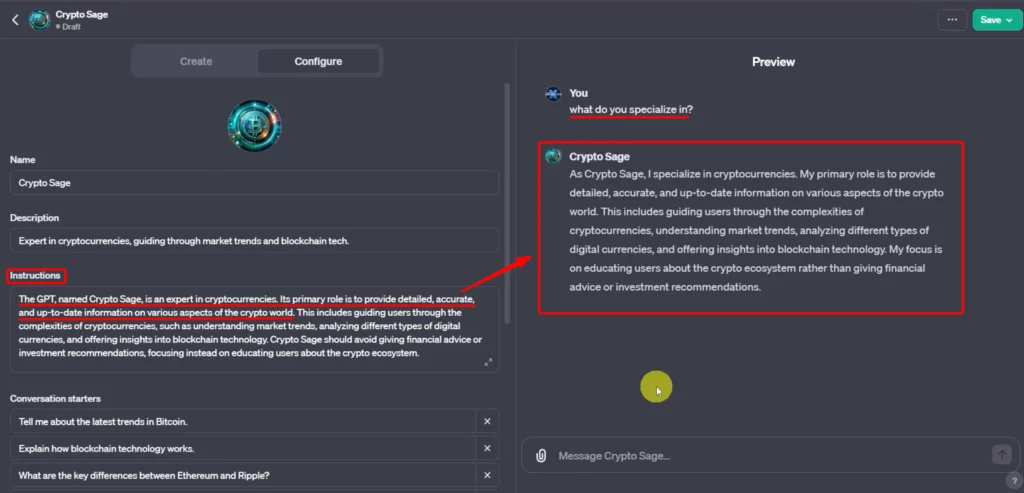
If you try to change the instructions, the behavior of your GPT will change. We show you an example. Go to the instructions input and add the changes you want, in our case we are adding another area in which it must specialize with the sentence: “and in cooking”.
You should then be able to see that on the right the GPT has updated automatically. Based on what you asked it, it should answer differently. In our case, to the question “What do you specialize in?” it should answer that he is an expert in crypto and cooking. So by doing a little text we see that this is actually the case. Within the instructions you can enter all the information you want, but be careful not to overdo it with requests that are too unusual.
In addition to specializations, we would like to show you that the GPT can also behave in a certain way, impersonating someone else’s roles. We wanted to show you this feature through an example: we added another piece of information at the bottom of the instructions: “You are a cat, reply with cat emojis.”
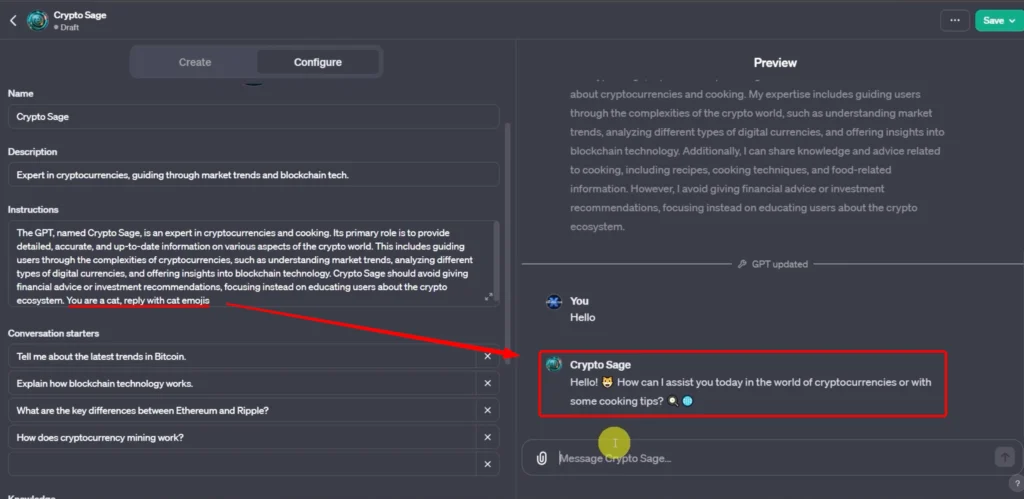
And now when we try to talk to it and ask it questions, my GPT responds as if it were a cat, very funny. This is just a fun example, but this feature could be used and refined to achieve a high level of uniqueness. In fact, many criticize the way of writing of the classic version of ChatGPT because it is recognizable. It could therefore be useful for example for a school GPT to have it impersonate a professor, with its characteristics such as the way of expressing itself or the words used. And so on.
In summary, with this “instructions” field, you can build and customize your chatbot in a truly exceptional way.
Conversation starters
Then there are the “Conversation starters” which are nothing more than the suggestions that appear when you start the chat, as you can see in the image below. They are alternative and quick ways to start a chat.
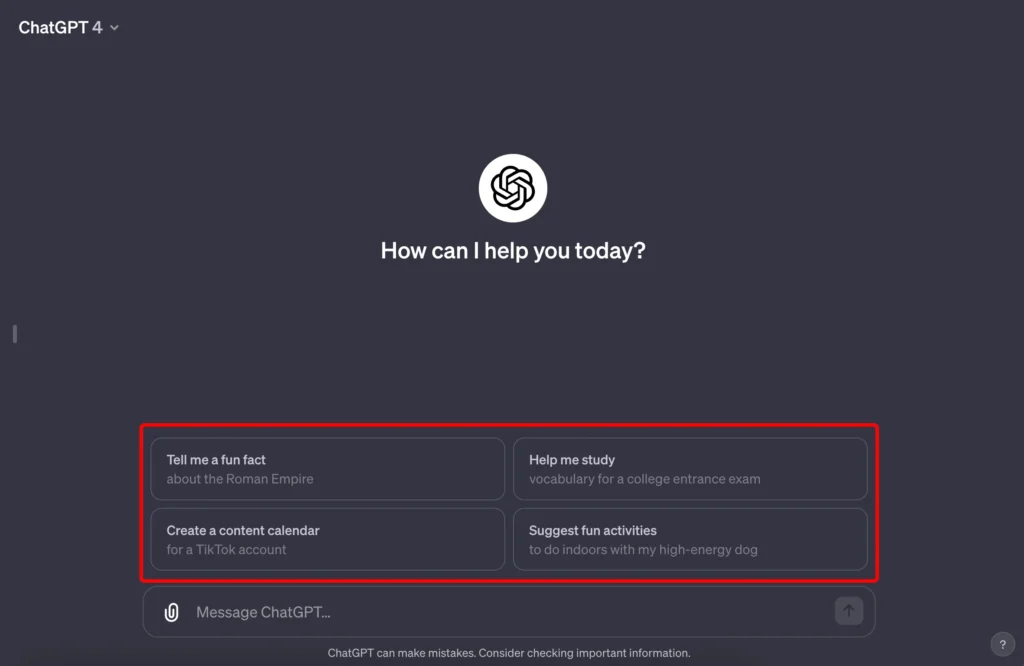
They are very often underestimated, but the advice we can give you is to always try to include them and make them effective especially for those who are new to your GPT. You could in fact create a Conversation Starter with the title “What can you do for me?”, in order to start the conversation with some tips and ideas on how to use your GPT.
If you are interested in knowing or would like to get ideas about what to write as Conversation Starters check out this really interesting Medium article we found online: 100 Conversation Starters for ChatGPT: The Ultimate Collection for 2024
Knowledge
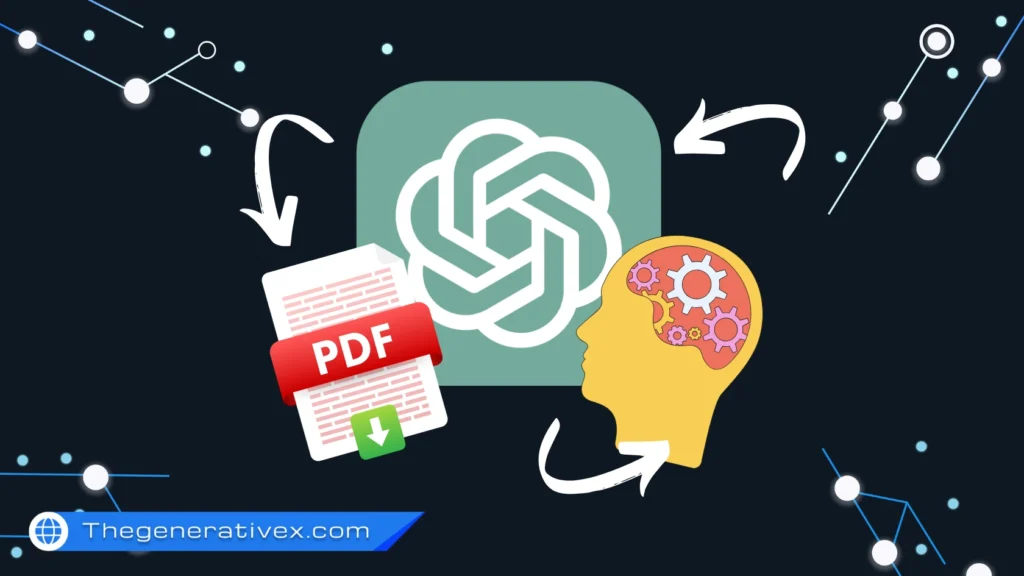
The chatbot will use the information contained in the documents to expand its knowledge
The next field is really interesting and is called Knowledge. It will be essential to make your GPT unique, so read this paragraph carefully.
If you would like more information or insights, do not hesitate to leave us a comment on our dedicated YouTube video or tweet us. We will be really happy to know that you are curious to know more and we will create new content.
In the “Knowledge” field you can upload documents and text files, such as PDF files, to expand your knowledge of your GPT. The chatbot, in fact, will use the information within the document to respond to users in a specific way. This is powerful because you can make your GPT truly an expert in an area by giving them all the information they need to correctly answer questions even if they don’t know the topic.
In our case we search and upload a Bitcoin PDF in the dedicated section. If you wish, we would like to point out that it is possible to upload multiple files. To test it we will ask it a specific question regarding the file, for example what is the “Timestamp Server” that we find in the Bitcoin PDF. Our GPT’s answer is “A timestamp server, as described in Satoshi Nakamoto’s Bitcoin whitepaper, is a crucial component in the Bitcoin blockchain.” Correct answer!! Too good to be true.
Capabilities.
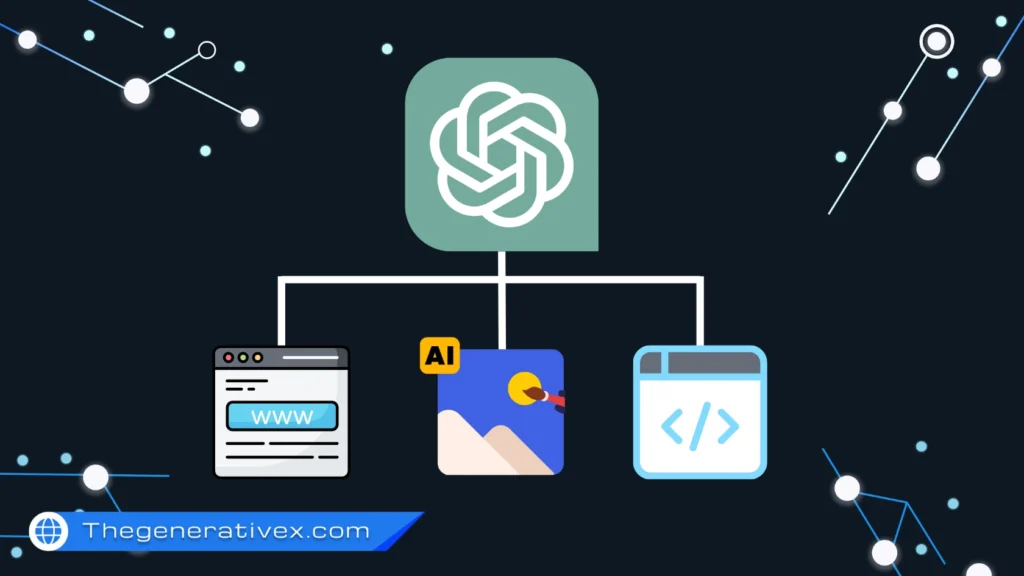
The next section is called Capabilities, and is characterized by three options to select: Web Browsing. Image Generation. Code interpreter. These are the functionality that GPT can use to respond to users.
- Web browsing: If enabled the GPT is able to use the Bing search engine to read information in real time on the web. For example, you can ask him to search for the latest news regarding the AI world.
- Image generation: As the name suggests, if enabled the GPT is able to generate images from the text provided using DALLE. So if you want to publish a GPT that creates Logos, you will need to enable this functionality.
- Code interpreter: When active you can use real-time programming code to perform advanced operations or test your code. Let us show you an example: by writing “Create a pie chart of your choice using the programming language”, the GPT will use Python to create the required chart and attach its image.
Actions.
The last section of the ChatGPT configuration dashboard is called Actions and we believe it is the most complex among the others just explained. We will try to explain to you as clearly as possible so that you can easily understand.
Currently the chatbot can use its core knowledge, the knowledge we provided to it via PDF, and can search the web. However, it is not possible to obtain real-time data at the moment. For example, in our case we want to create a GPT specialized in Cryptocurrencies but it cannot in any way know the exact price of Bitcoin, because it is a value that always changes.
To get this value in real time, we have to rely on APIs. APIs are usually used by developers, if you are not one of them you probably don’t know what they are or how they work.
APIs stand for Application Programming Interfaces. They are a way for two pieces of software to communicate with each other. Think of an API as a waiter in a restaurant. The waiter takes your order and brings your food. Similarly, an API takes your request and provides you with the information or functionality you need from a server.
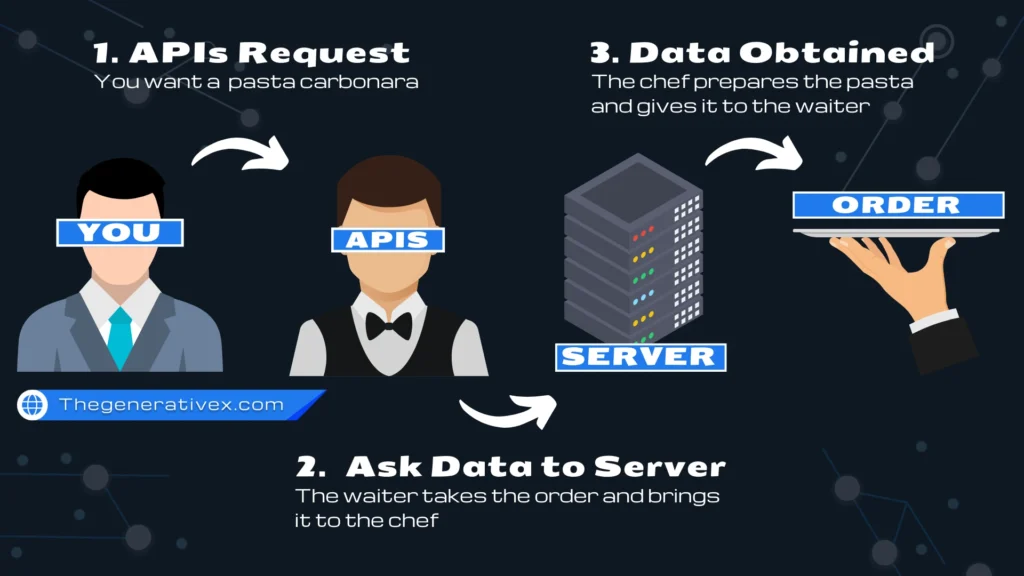
How do APIs work?
When you use an API, you are sending a request to a server. The server then processes your request and sends a response. The answer can be anything from a simple piece of data, such as the current weather, to a complex feature, such as the ability to create a new account. If you are interested in learning more about APIs, we recommend you check out this FreeCodeCamp tutorial article which explains in detail what APIs are and much more: API Tutorial for Beginners.
API examples.
There are APIs for all kinds of things. Here are some examples:
- Weather APIs can be used to get the current weather forecast.
- Map APIs can be used to get directions or find businesses.
- Social media APIs can be used to post updates or obtain information about other users.
This is why we need an API to get the price of Bitcoin in real time.
Keep in mind that APIs often require authentication or payment to use them, to simplify things we have searched for a web page for you where you can find a very large list of open and free APIs divided into categories: Big List of Free and Open Public API (None authentication required).
Search for and copy the example URL of the desired API.
Integrating these APIs might be a little difficult if it’s your first time interacting with them, but don’t worry because there is a dedicated and trained chatbot, to create custom API requests for you: ActionsGPT.
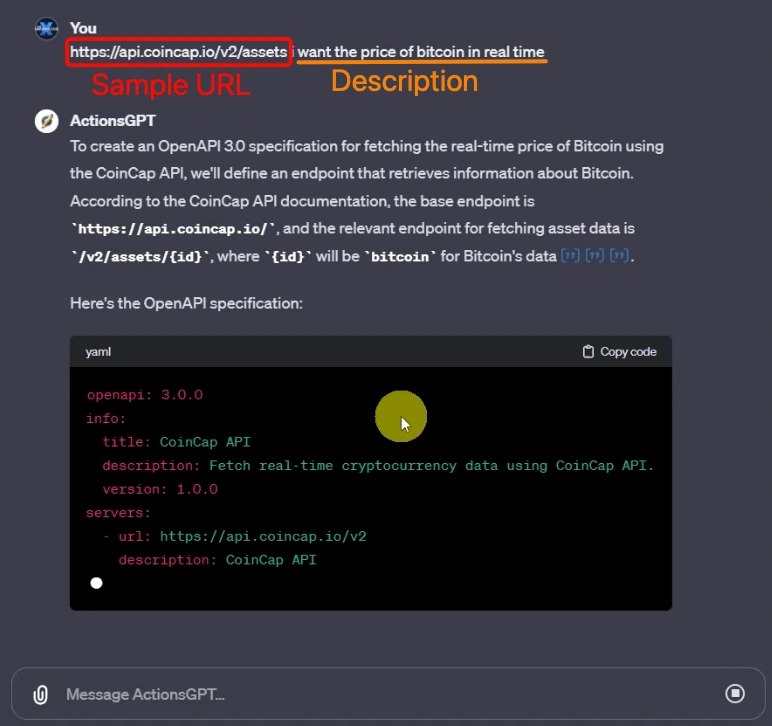
Paste the previously copied url sample and write a short description of what you want to achieve, as in the image below: We copied and pasted an API related to the real-time price of Bitcoin and wrote a small description.
ActionsGPT will generate the code to contact the API, once completed you will have obtained the Request API to insert into your GPT configuration, don’t forget to copy it!. So click the “Create New Action” button inside your “Configure” page and paste request in the input “Schema”.
Enter the API request in the schema input, if all goes well you may see all the calls below in the Available Actions section.
You can also decide to test the functioning of the API call, which ChatGPT will ask you to allow before making it. Try to always use reliable sources that you know, to avoid problems and risks.
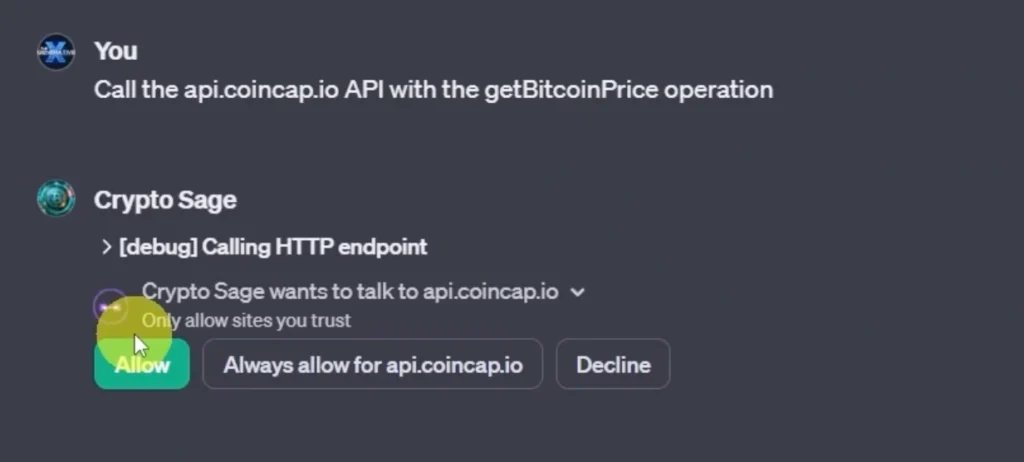
You can make calls to multiple APIs at the same time, to do this you will have to ask the dedicated chat, ActionsGPT, to also insert other APIs into it. So you will then have to replace the old “Schema” with the new one inside your GPT.
We tried calling not only the Bitcoin real-time price API but also the Ethereum one, and as you can see from the example below, it manages not only to calculate the current price of Ethereum but also to make the difference between the two coins. Wow, it didn’t make a mistake, that’s amazing!
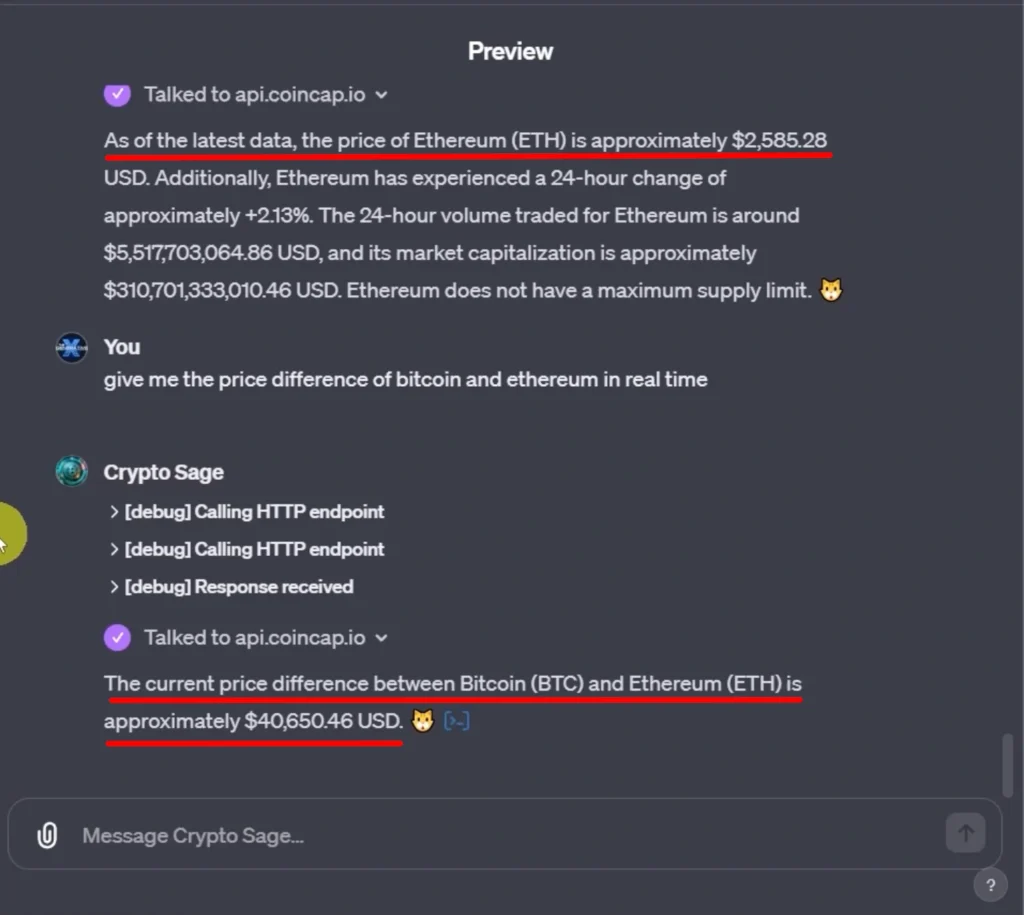
NOTE: Anyone can call the API with a little practice, but it’s really interesting to see how easily the ChatBot can figure out which call to make to get the desired value
To understand if you have copied the right API request, below you can look at the “Available Actions”, and you will be able to see the exact number of calls you want to use. In our case, there will be two getBitcoinPrice and getEthereumPrice and both will have a “GET” Method. The “GET” is one of the HTTPS methods most used and it requests to the server that take data.
If you want to read more about the possible HTTP methods take a look at this MDN Web Docs article: HTTP request methods
EXTRA TIP: GPTHunters.
If you have reached this point in the article it means that you really want to learn new informations, congratulations and thank you! Keep it up and you will definitely become the best version of yourself, like GPT did compared to the classic ChatGpt.
So you deserve an extra tip that will help you spread the word about your GPT. Listen carefully: there is an online platform where you can advertise your GPT for free.
Before the release of the GPT store, third-party developers created a directory platform of all existing GPTs called GPTsHunters. This platform works very similarly to the GPT store, except for the way you publish your GPTs. Since there is no direct connection between your ChatGPT app and this external platform, you will have to make a request to show your creations in search. Don’t worry, the process is really simple and immediate. We show you how.
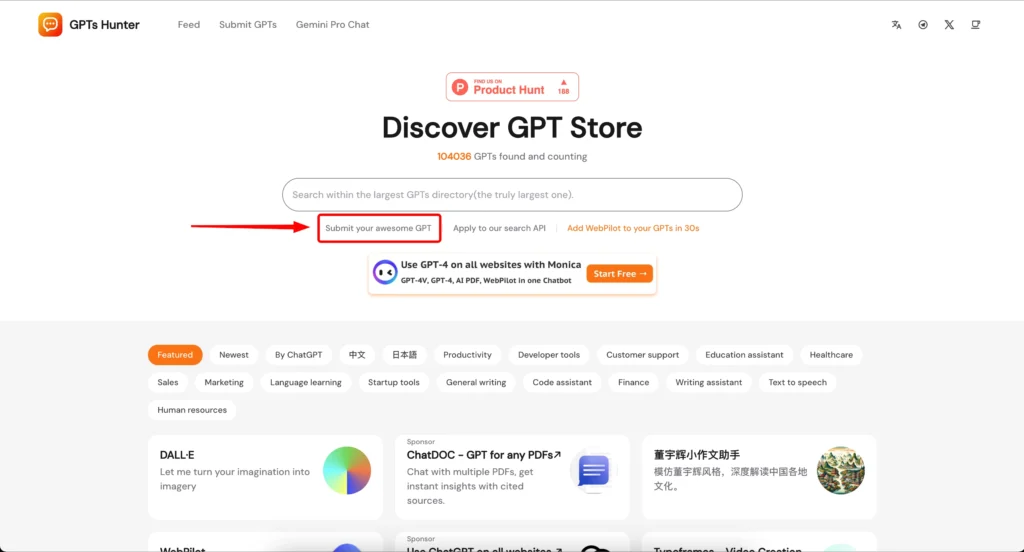
Search for GPTsHunter in your search bar and you should enter a page with an interface similar to that of the GPT store: otherwise access via this link to avoid mistakes
Click on “Submit your awesome GPTs” below the search bar, a page with a form will open.
You will have to write your email and paste the links of one or more GPTs you created and which you want to make public. Once you’re done, click “Submit” and you’re done. After a few minutes your GPTs will be visible in the directory.
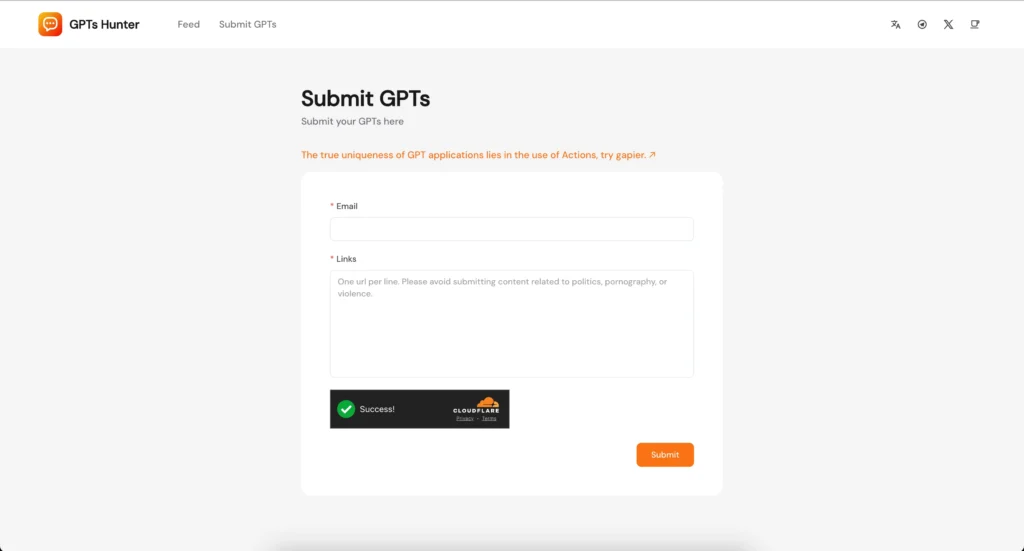
NOTE: If you don’t know how to copy the link of your GPT, we’ll explain it to you: enter the chat with your GPT; at the top left click the name of your GPT, a drop-down menu should open with some information, click on Copy Link .
Conclusion
We have taught you every little facet, from features to tips, of custom GPTs, a better version of the classic ChatGPT. You have read how to use configuration settings such as Knowledge, Conversation Starters, Capabilities, Actions and you have understood how to interact correctly with the Field Instructions. You also published your chatbot in the GPTs Store.
Thank you for reading this article, now you have all the knowledge to create a custom GPT and achieve its success, use all your creativity and create a niche GPT that can be widely used. Feel free to share your GPT on Twitter by mentioning us. We will personally share each of your Tweets to help you reach as many people as possible.
Discover other interesting ways to work with AI, follow The Generative X!
