
Introduction
Greetings and welcome to The Generative X Blog! Are you curious about Stable Diffusion, yet unsure of its nature or functionality? Or would you like to be able to use it to improve your financial situation but don’t know where to start? You are in the right place!
If you are interested, additional details on Stable Diffusion are available in our YouTube video “How to Install Stable Diffusion – Automatic1111 WebUI latest version 2024“: we encourage you to explore and share your thoughts! We wrote this guide for Windows 10 and 11 users. If you’re on a Mac, no worries! Just check this article for a special tutorial we’ve put together just for Apple fans. Now let’s get to the heart of this article!.
We at The Generative X are your guide to the world of financial freedom through artificial intelligence. This is our first article and we are excited to start our journey with a tutorial on how to install Stable Diffusion, a text-to image model that allow you to create stunning images like the ones you see below.

There are tons of ways to use image generation to make money, but for this article we’ll just walk you through how to install Stable Diffusion and start generating images.
And hey! Don’t forget to share this article with your friends or colleagues, also subscribe to our YouTube channel The Generative X so you won’t miss out on all the cool videos we’ve got lined up. Stay in the loop with AI’s latest and discover how you can make money with AI or simply have fun with it!
The following table contains all the links necessary to correctly follow this tutorial:
Important Links
| Youtube Channel | https://www.youtube.com/@TheGenerative_X |
| Twitter Account | https://twitter.com/thegenerativex |
| Online Course | https://thegenerativex.com/course/ |
| Python Installation | https://www.python.org/downloads/release/python-3106/ |
| GIT Installation | https://git-scm.com/downloads |
| Stable Diffusion Installation | https://github.com/AUTOMATIC1111/stable-diffusion-webui |
Requirements
To run Stable Diffusion locally there are minimum hardware requirements to meet. We are talking about your PC’s video card. You require to have minimum of 4GB of Vram in order to make Stable diffusion works. If you don’t know what we are talking about, don’t worry, we will explain how to check the memory of your video card on Windows.
Video random-access memory (VRAM) is dedicated computer memory used to store the pixels and other graphics data as a framebuffer to be rendered on a computer monitor.
wikipedia
In the opened window, search for “GPU” and select it. Now scroll down and look for Dedicated “GPU Memory”. If you have at least 4GB here then you are ready to proceed.
If you don’t see any GPU it means your computer doesn’t have a dedicated video card. If this is the case don’t worry, we wrote another article on alternative ways to use stable diffusion: “How to use stable diffusion without GPU: Online and Free!” .
Python installation
First you need to prepare your computer with all the necessary software: to install Stable diffusion you have to install Python and Git. We’ll see together what they are.
Python is the programming language used to develop the stable diffusion model.
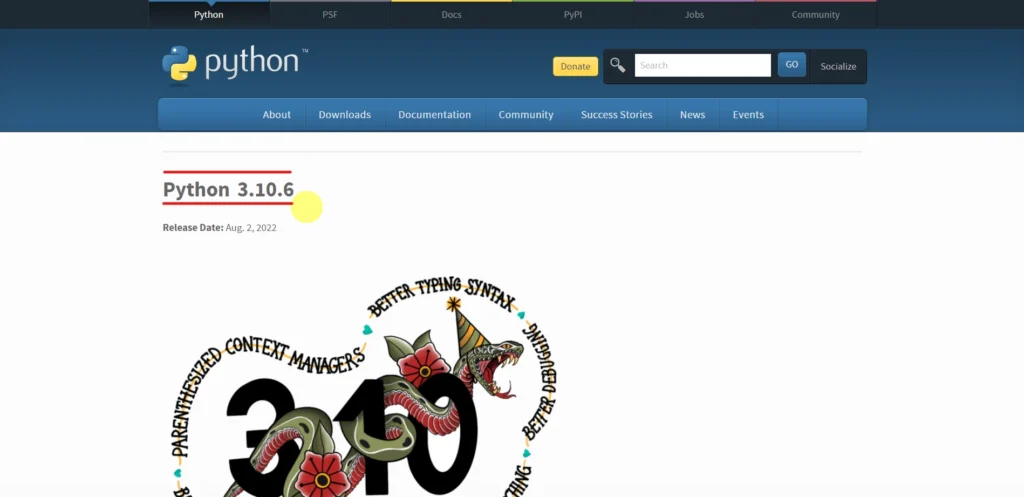
In this case you must install a specific version, version 3.10.6. If you already have python make sure you have the correct version, otherwise follow these steps. Note: using a lower or higher version will prevent stable diffusion from working. To install python open your search engine and type “python 3.10.6 Download”.
Now open the first result and make sure you are on the same page as the one below: click here to open the right page.
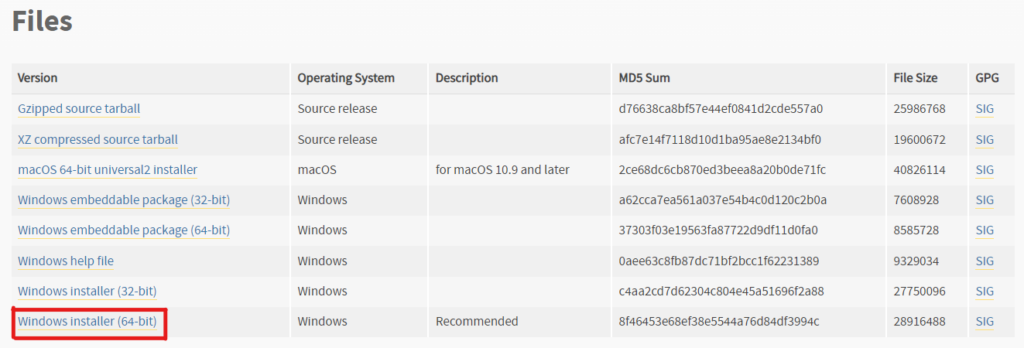
When you are on the right page, scroll down and click the recommended “Windows installer 64bit” link.
An installation file will download. Once you have downloaded the file, click on it and the installation window will open. Before proceeding with the installation, make sure to enable the “Add Python to Path” checkbox. This step is important to avoid errors, so make sure you enable it.
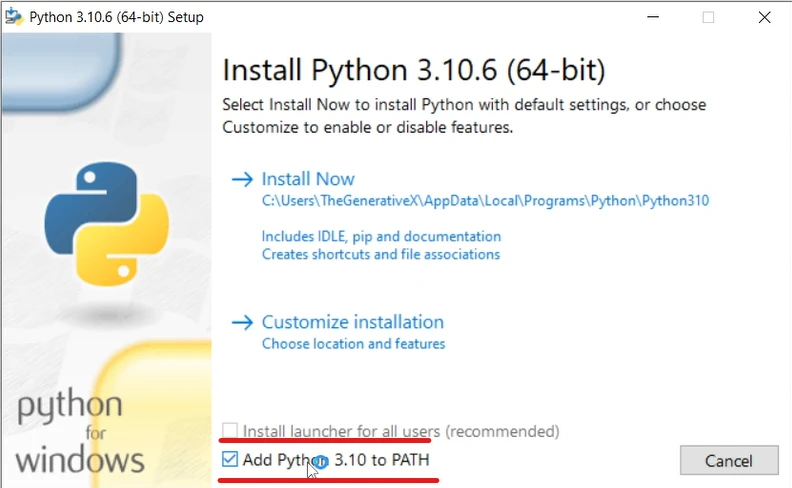
Now click on “Install now” and wait for the installation to complete. Great job! Now you have the correct version of Python.
Extra TIP: Check your Python version after downloading
To ensure that everything is in order and that Python has been installed successfully let’s do a quick check. Navigate to your windows start button, type “CMD” and click enter.
Now type python --version . If your Python installation was successful, you should see Python 3.10.6.
If you receive an error message, restart your computer and try again. If you still encounter errors, contact us on Twitter or you can write to us in the comments below our video. We will be happy to help you.
GIT Installation
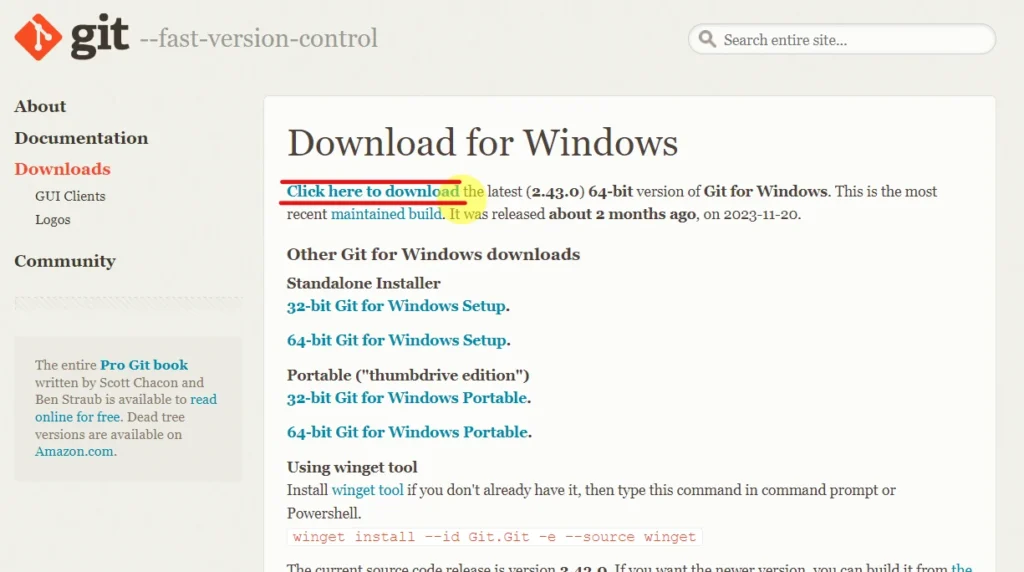
Great, now you need to download GIT: To proceed with the installation you need to go back to your internet search engine and type “GIT”.
To access the download section of GIT click this link. Once you enter the page, click the Windows icon. Then select the “Click here to download” and wait for GIT to install.
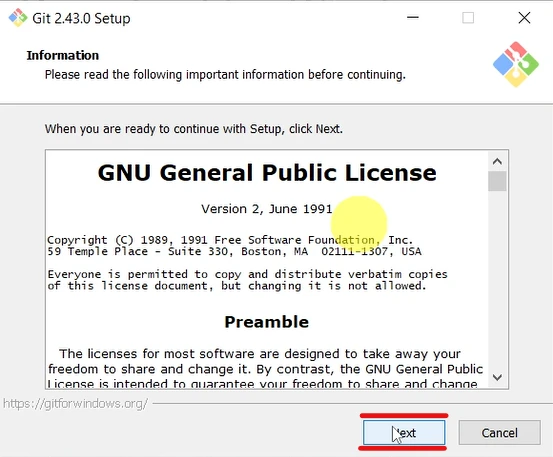
Once the file has been downloaded, click it and an installation screen will open: you have to proceed by clicking “Next” several times and then “Install”. It will take a few minutes. In the meantime, I remind you to take a look at our dedicated YouTube video “How to Install Stable Diffusion – Automatic1111 WebUI latest version 2024“ , in particular the “Let’s Install Git” chapter, where you can visually follow each step.
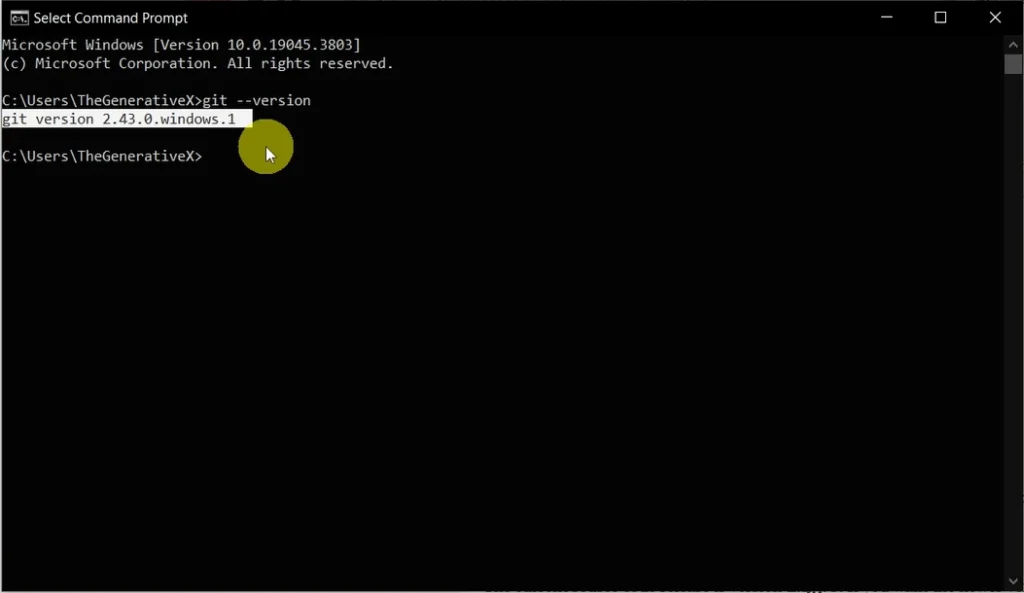
When the installation has been completed, check that everything was successful: to do so, type git --version in the command prompt (CMD): if no error messages are shown you have successfully downloaded Git, great job!.
Automatic1111 Installation
Once you have installed Python and Git, you need a user-friendly application to generate your art using Stable Diffusion. One popular and efficace option is to utilize the web interface Automatic1111. This interface has gained widespread popularity, and you’ve likely encountered it before. With Automatic1111, you can seamlessly generate your artwork with just a few clicks, making the process effortless and intuitive.
To start, click this link which will take you to the A1111 source code page: this way you will be sure that you are not downloading harmful programs for your computer.
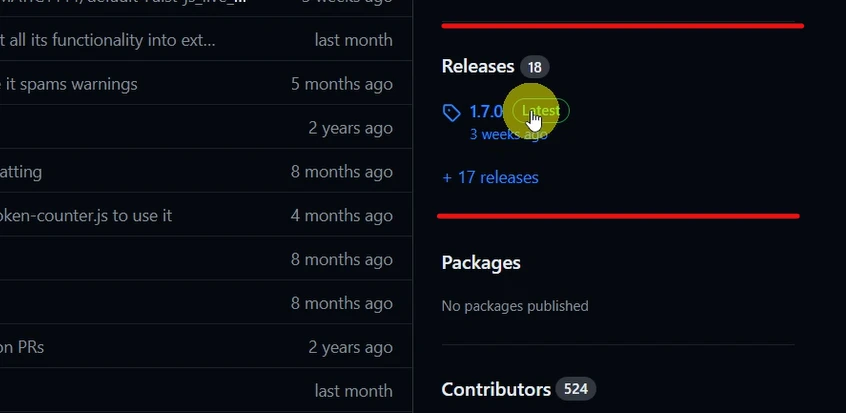
Once you enter the link, you will find yourself on the Github page. It’s a platform where developers publish software source code. Scroll down the page until you find the “Releases” section on the right, during the writing of this article the last version is the 1.7.0 . If you see a version other than 1.7.0, we recommend you to always download and use the most recent one.
Then click on the latest version, and at the end of the page you will find the “Assets” section: select the first “Source Code Zip” . Now you have to extract the contents of the zip downloaded, to be able to easily do it we recommend creating a new folder on your desktop and place the opened zip file alongside that folder: you must enter the “Stable diffusion” folder and select everything with "Ctrl + A", then drag the contents into the created folder. If you can’t drag it, after selecting everything with "Ctrl+A", copy "Ctrl+C" and paste it using "Ctrl+V" into the folder.
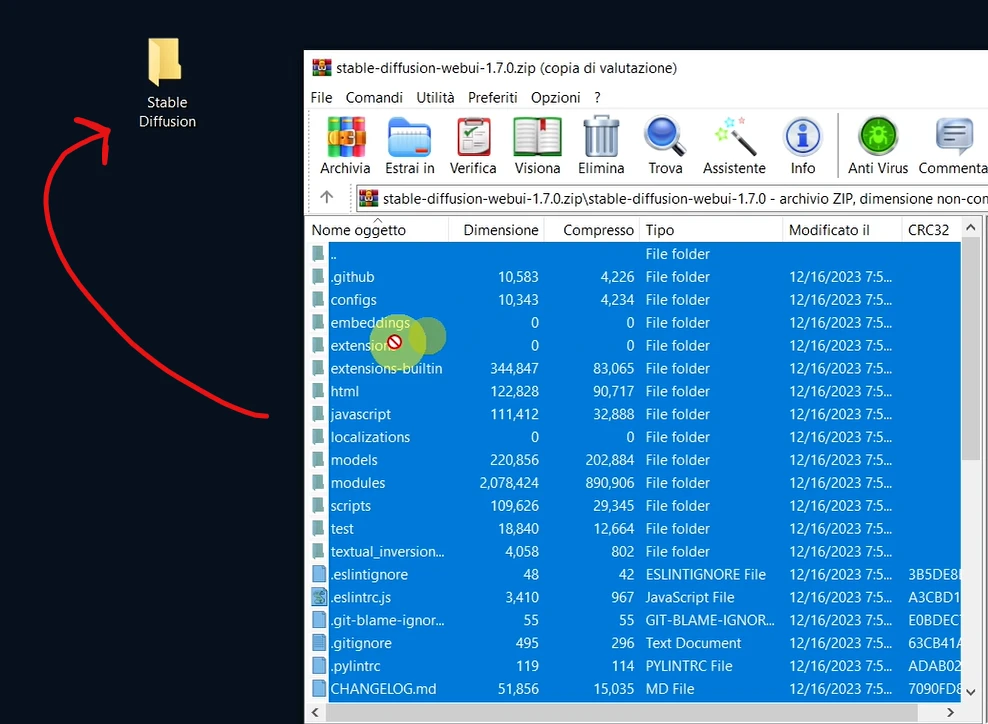
Perfect, you’ve extracted Stable Diffusion folder content, now you can close the zip file, you won’t need it anymore. Inside the Stable Diffusion folder there will be many files, but don’t worry: for now, you don’t need to know what all these folders do, in the future we will explain the most essential one.
Before installing Automatic1111 interface, you need to make some configuration changes: for the moment you will only have to copy the full text file below, then paste it into the file webui-user.bat. Much easier!, the configuration is a very important process so be very carefully otherwise you would encounter errors in the next steps. In the next articles we will explain how exactly this file works and what other changes you will and can make to improve your image generation.
git pull
@echo off

set PYTHON=
set GIT=
set VENV_DIR=
set COMMANDLINE_ARGS= --xformers

call webui.bat| what | why | where |
|---|---|---|
| git pull | to always have the updated version of Automatic1111 | at the top of the file, as first text |
| –xformers | to improve image generation performance. | as “COMMANDLINE_ARGS” value (after equal sign ) |
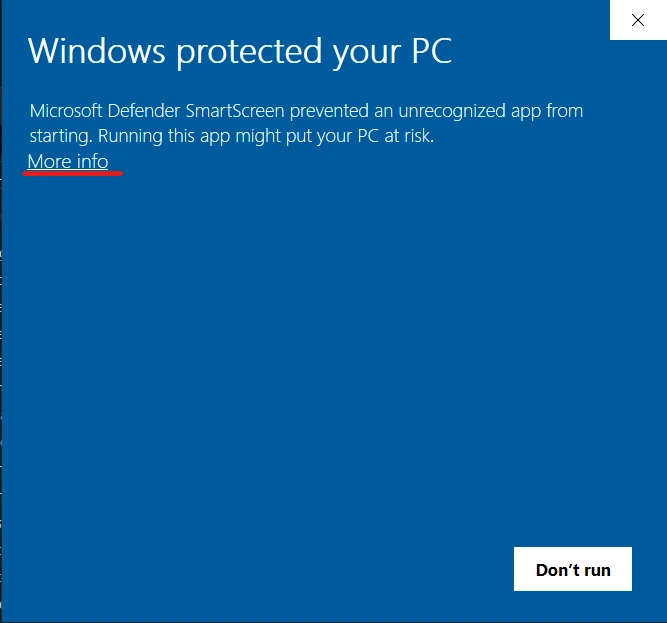
Then close the tab and double-click with the left mouse button on the file you just edited called “webui-user.bat”. Automatic1111 will begin to download. It may happen that Windows considers running this file dangerous for your computer and therefore prevents you from opening it – don’t worry, this process will not cause harm to your computer, it’s just that Windows does not recognize this file as not a normal file. To solve this problem, proceed by clicking “More info” and then “Run anyway”, in this way you will be able to access the file and install Automatic1111.
If you’ve completed all the previous steps correctly, you will be able to see that megabytes of files are downloaded. It may take a while.
If all the files have been downloaded correctly and therefore everything is successful, the automatic1111 web interface will automatically open in your default browser.
If you’ve made it this far, great job! You’ve already done most of the work and are now ready to generate the images. However, if you encountered problems during the installation of Stable Diffusion, try following all the previous steps again and make sure you have done them correctly. If problems persist, do not hesitate to write us on Twitter or leave a comment under our dedicated YouTube video, we will try to help you promptly.
How to open Automatic1111
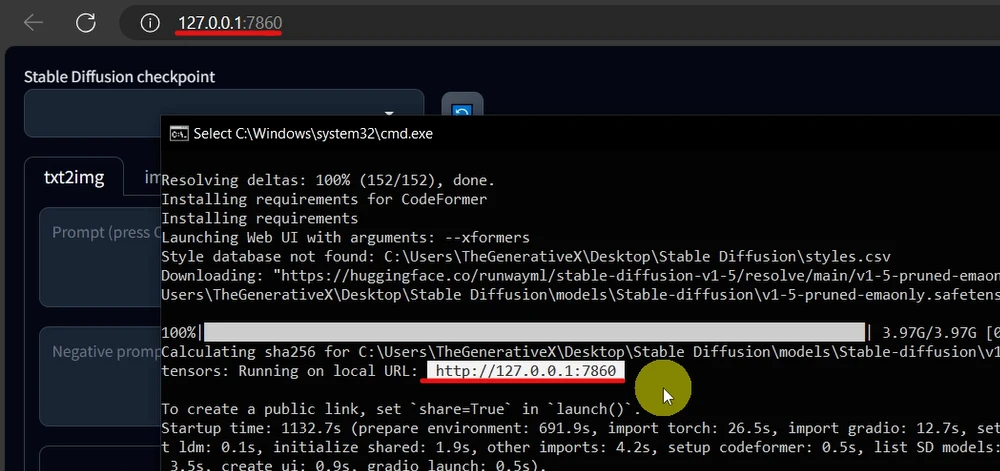
Once the Automatic1111 interface is open, you will be able to notice a URL in the top address bar: this one corresponds to the local address of your computer, and is followed by a number called port (in my case the interface opened in port 7860).
We explain this to you because if you accidentally closed your browser tab or the interface does not start automatically, you will be able to open it manually thanks to the information present in the terminal. As you can see in the image below, the address on your browser is the same as the one indicated in the terminal. Simply select this address with the mouse, copy it using the shortcut "Ctrl+C" and pasting with "Ctrl+V" into a tab of your browser.
If you have difficulty following these steps or need more information, we would like to point out that we have created a course dedicated to Stable Diffusion: you will learn how to generate realistic AI Influencer Models using Stable Diffusion.
We will take you from having no knowledge to becoming a Stable Diffusion Expert. If you want to find out how to earn money using this amazing AI model, check out this link and access the course. We have worked hard to create this course and would like to share our knowledge with you!
Now let’s continue our tutorial. In the first box of A1111 interface, at the top, you can enter a “prompt“: for simplicity, the prompt is the description of the image you want to generate. Write a small description in the prompt, in my case I wrote “dog Illustration”, you can describe anything you want to generate. Then click the orange “Generate” button on the right.
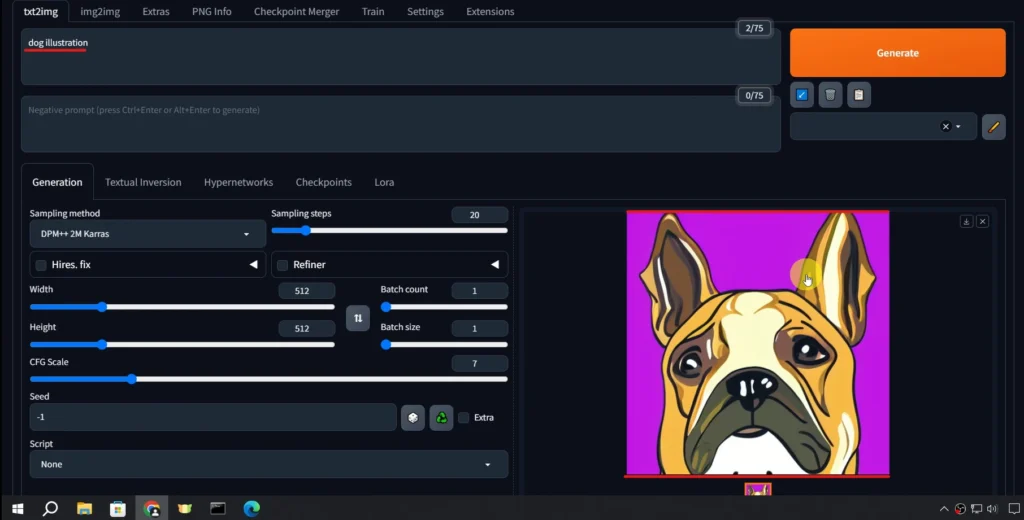
If everything has worked you should be able to see an image that represents, even approximately, your prompt: if your image is deformed or inconsistent with the prompt, don’t worry this is due to the fact that we haven’t set the correct settings yet.
Conclusion
We have taught you how to install Automatic1111 interface and Stable diffusion on Windows operating systems. We have guided you in installing Python and Git, essential programs to be able to start automatic1111. Furthermore, you have installed the correct A1111 interface and configured Stable Diffusion to be able to launch and use it. You have learned how to manually open A1111 and also generated your first image. Congratulations!!
In the next article we will delve into every little part of this incredible automatic1111 interface, we will reveal useful tips and teach you how to generate stunning images. If you are interest in discovering how to install Automatic1111 on macOS read more in the dedicated article, clicking this link.
We also wrote an article and posted a video on YouTube for those who can’t use Stable Diffusion locally, allowing them to generate high quality images too – check it out: “How to use stable diffusion without GPU: Online and Free!” .
Don’t forget to share this article with your friends and colleagues; also subscribe to our Twitter Account and YouTube channel. Check out our other articles if you want to increase your knowledge about living with AI for a secure future.